
Anonymizing Scans in 3DICOM
An Introduction to Anonymization in 3DICOM
3DICOM offers secure, user-friendly options for anonymizing medical images—both during upload and through its dedicated anonymization tool.
This guide explains what anonymization is, how 3DICOM’s anonymization options work, when and why you might want to use them, and provides step-by-step instructions for using each option.
What is Anonymization?
Anonymization is the process of removing or hiding identifiable personal information from medical images to protect patient privacy and confidentiality.
On the 3DICOM platform, this means that details such as patient names, dates of birth, IDs, and other sensitive data can be removed from medical imaging files during upload or locally via the anonymization tool.
Understanding when to use Anonymization
Anonymization of medical data is often used when individuals want to protect their privacy, such as when sharing images for second opinions, participating in research, or storing data in the cloud.
Anonymization helps ensure personal details aren’t linked to the medical images. However, in situations where accurate identification is essential—like ongoing medical care, personal health records, legal cases, or insurance claims—keeping data identifiable ensures clear association with a person’s medical history and supports continuity of care or documentation requirements.
When you might want to anonymize medical data:
Anonymization Recommendations for User Types
While anonymization within 3DICOM is optional, it is encouraged to support privacy, compliance, and proper data handling in a number of circumstances.
Anonymization recommendations for different user groups are detailed under the tabs below.
Researchers and educators using real-life case studies or medical imaging should always anonymize scans.
This protects patient confidentiality, ensures ethical data handling, and complies with standards like HIPAA and GDPR. Anonymization is essential when sharing data in publications, teaching, or collaborative settings where PHI must not be disclosed.
Stay tuned: 3DICOM is working to enhance its Anonymization Tool with additional functionality to give users greater control over how medical images are anonymized. Soon, users will be able to select from standardized DICOM anonymization profiles, enabling them to tailor the anonymization process to suit specific needs while aligning with HIPPA standards. This will provide added flexibility for professionals managing data for clinical, research, or educational purposes.
Understanding 3DICOM’s Anonymization Options
Both of 3DICOM’s anonymization options offer secure, user-friendly ways to anonymize medical images, but each produces a different output. Understanding these differences will help you choose the method that best suits your anonymization needs.
How both options work is explained in the tabs below.
Anonymization Tool:
The 3DICOM Anonymization Tool lets you automatically anonymize your medical images directly on your device—without uploading any files to the cloud. The tool runs in your browser, removing personally identifiable tags from the metadata of each DICOM file while keeping everything local. Once the process is complete, you’ll receive a packaged ZIP file of the anonymized images, ready for secure storage or sharing as you choose.
How to Anonymize a Scan on Upload
A scan can be anonymized during upload to ensure all personally identifiable information is removed before storage on 3DICOM’s servers.
Instructions on how to anonymize your scan during upload are provided below.
From Upload Scan
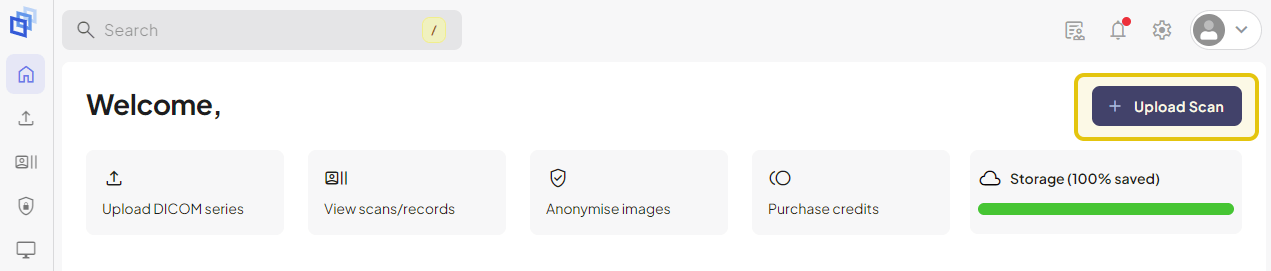
Steps to get there:
For a detailed walkthrough of the upload process, see the Uploading Your Medical Data to 3DICOM help guide.
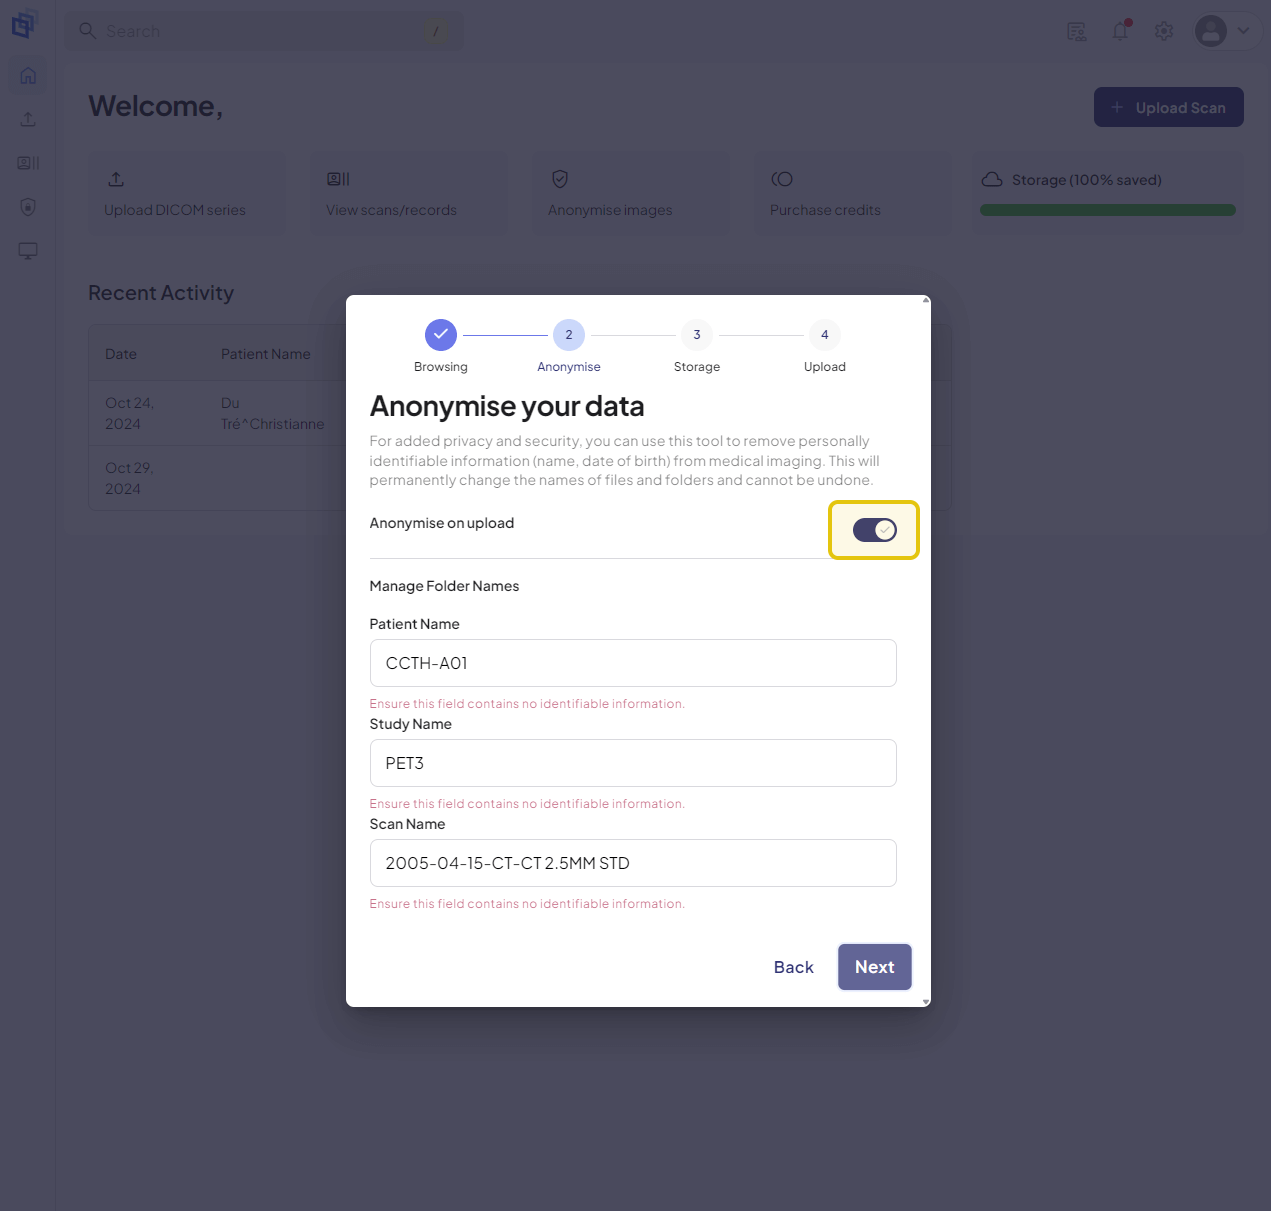
Managing Folder Names: Folder names are used to help you organize and identify scans uploaded to your 3DICOM Dashboard. Giving them a specific name can make it easier to find later. However, keep in mind that this information will also be included if you share the scan.
How to Use the Anonymization Tool
With 3DICOM’s Anonymization Tool, you can anonymize scans locally in your browser and download them as a ZIP file—no upload to 3DICOM’s servers required.
Instructions on using the anonymization tool are provided below.
From Anonymize Images

Steps to get there:
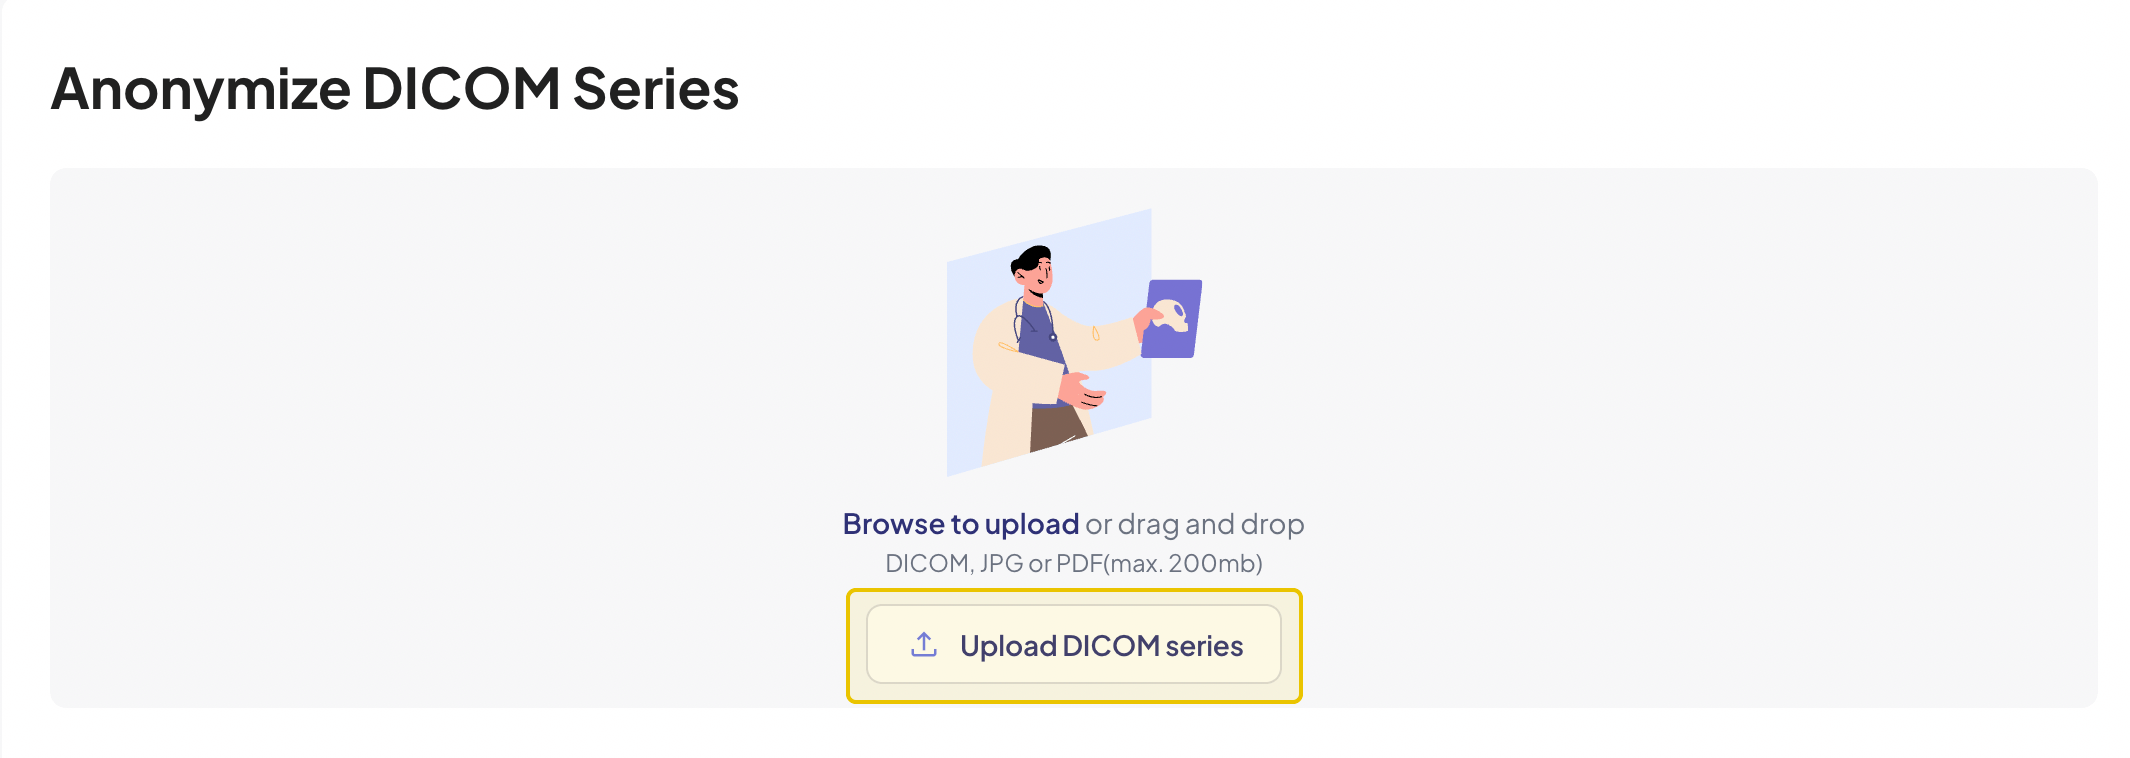
Files must be under 200 MB to proceed. If your DICOM series exceeds this limit, consider compressing the files.
Although the term “upload” is used, scans anonymized with this tool are never sent to or stored on your 3DICOM Online Viewer account. The entire “upload” and “download” process happens locally within your browser, on your device.
No actions can be performed on the records listed under “Recent Anonymised Series.” These records are temporary and will be cleared the next time you delete your browser data,
CONCLUSION
3DICOM’s integrated anonymization features ensure patient privacy by removing personal identifiers from medical scans. Whether you’re uploading to your 3DICOM account or using the standalone anonymization tool, you can securely create de-identified scans. This is ideal for patients storing records, educators using case studies, and researchers working with clean datasets.