
Understanding 3DICOM’s Storage Options
An Introduction to 3DICOM’s Storage Options
3DICOM offers flexible storage solutions for storing and accessing medical imaging records. This guide explains the two available storage options, when to choose them, where to do so in the platform, and how to upgrade or downgrade your scan storage.
3DICOM Storage Options
Two storage options are available for storing your scans and records in the 3DICOM Viewer.
All 3DICOM subscriptions include a set number of complimentary 3DICOM Credits, which can be used to upgrade your scans to Long-Term Cloud Storage. Read all about 3DICOM Credits in this handy guide.
Each storage option is detailed under the tabs below.
Long-Term Cloud Storage
| Storage Type | Credits | Access Period |
|---|---|---|
| Long-Term Cloud Storage | 5 credits per scan/year | 365 days |
The best choice for secure, ongoing, convenient access to your medical imaging records, 3DICOM’s Long-Term Cloud Storage lets you store selected scans for 365 days at just 5 credits per scan. This provides you access to your records anytime—for consultations, mobile viewing, or sharing with specialists—wherever you are.
Selecting a Storage Option on Upload
3DICOM enables users to select their preferred storage option on upload when uploading their medical scans.
Instructions on how to select your storage option on upload are provided below.
How to Select your Storage Option on Upload
Steps to get there:

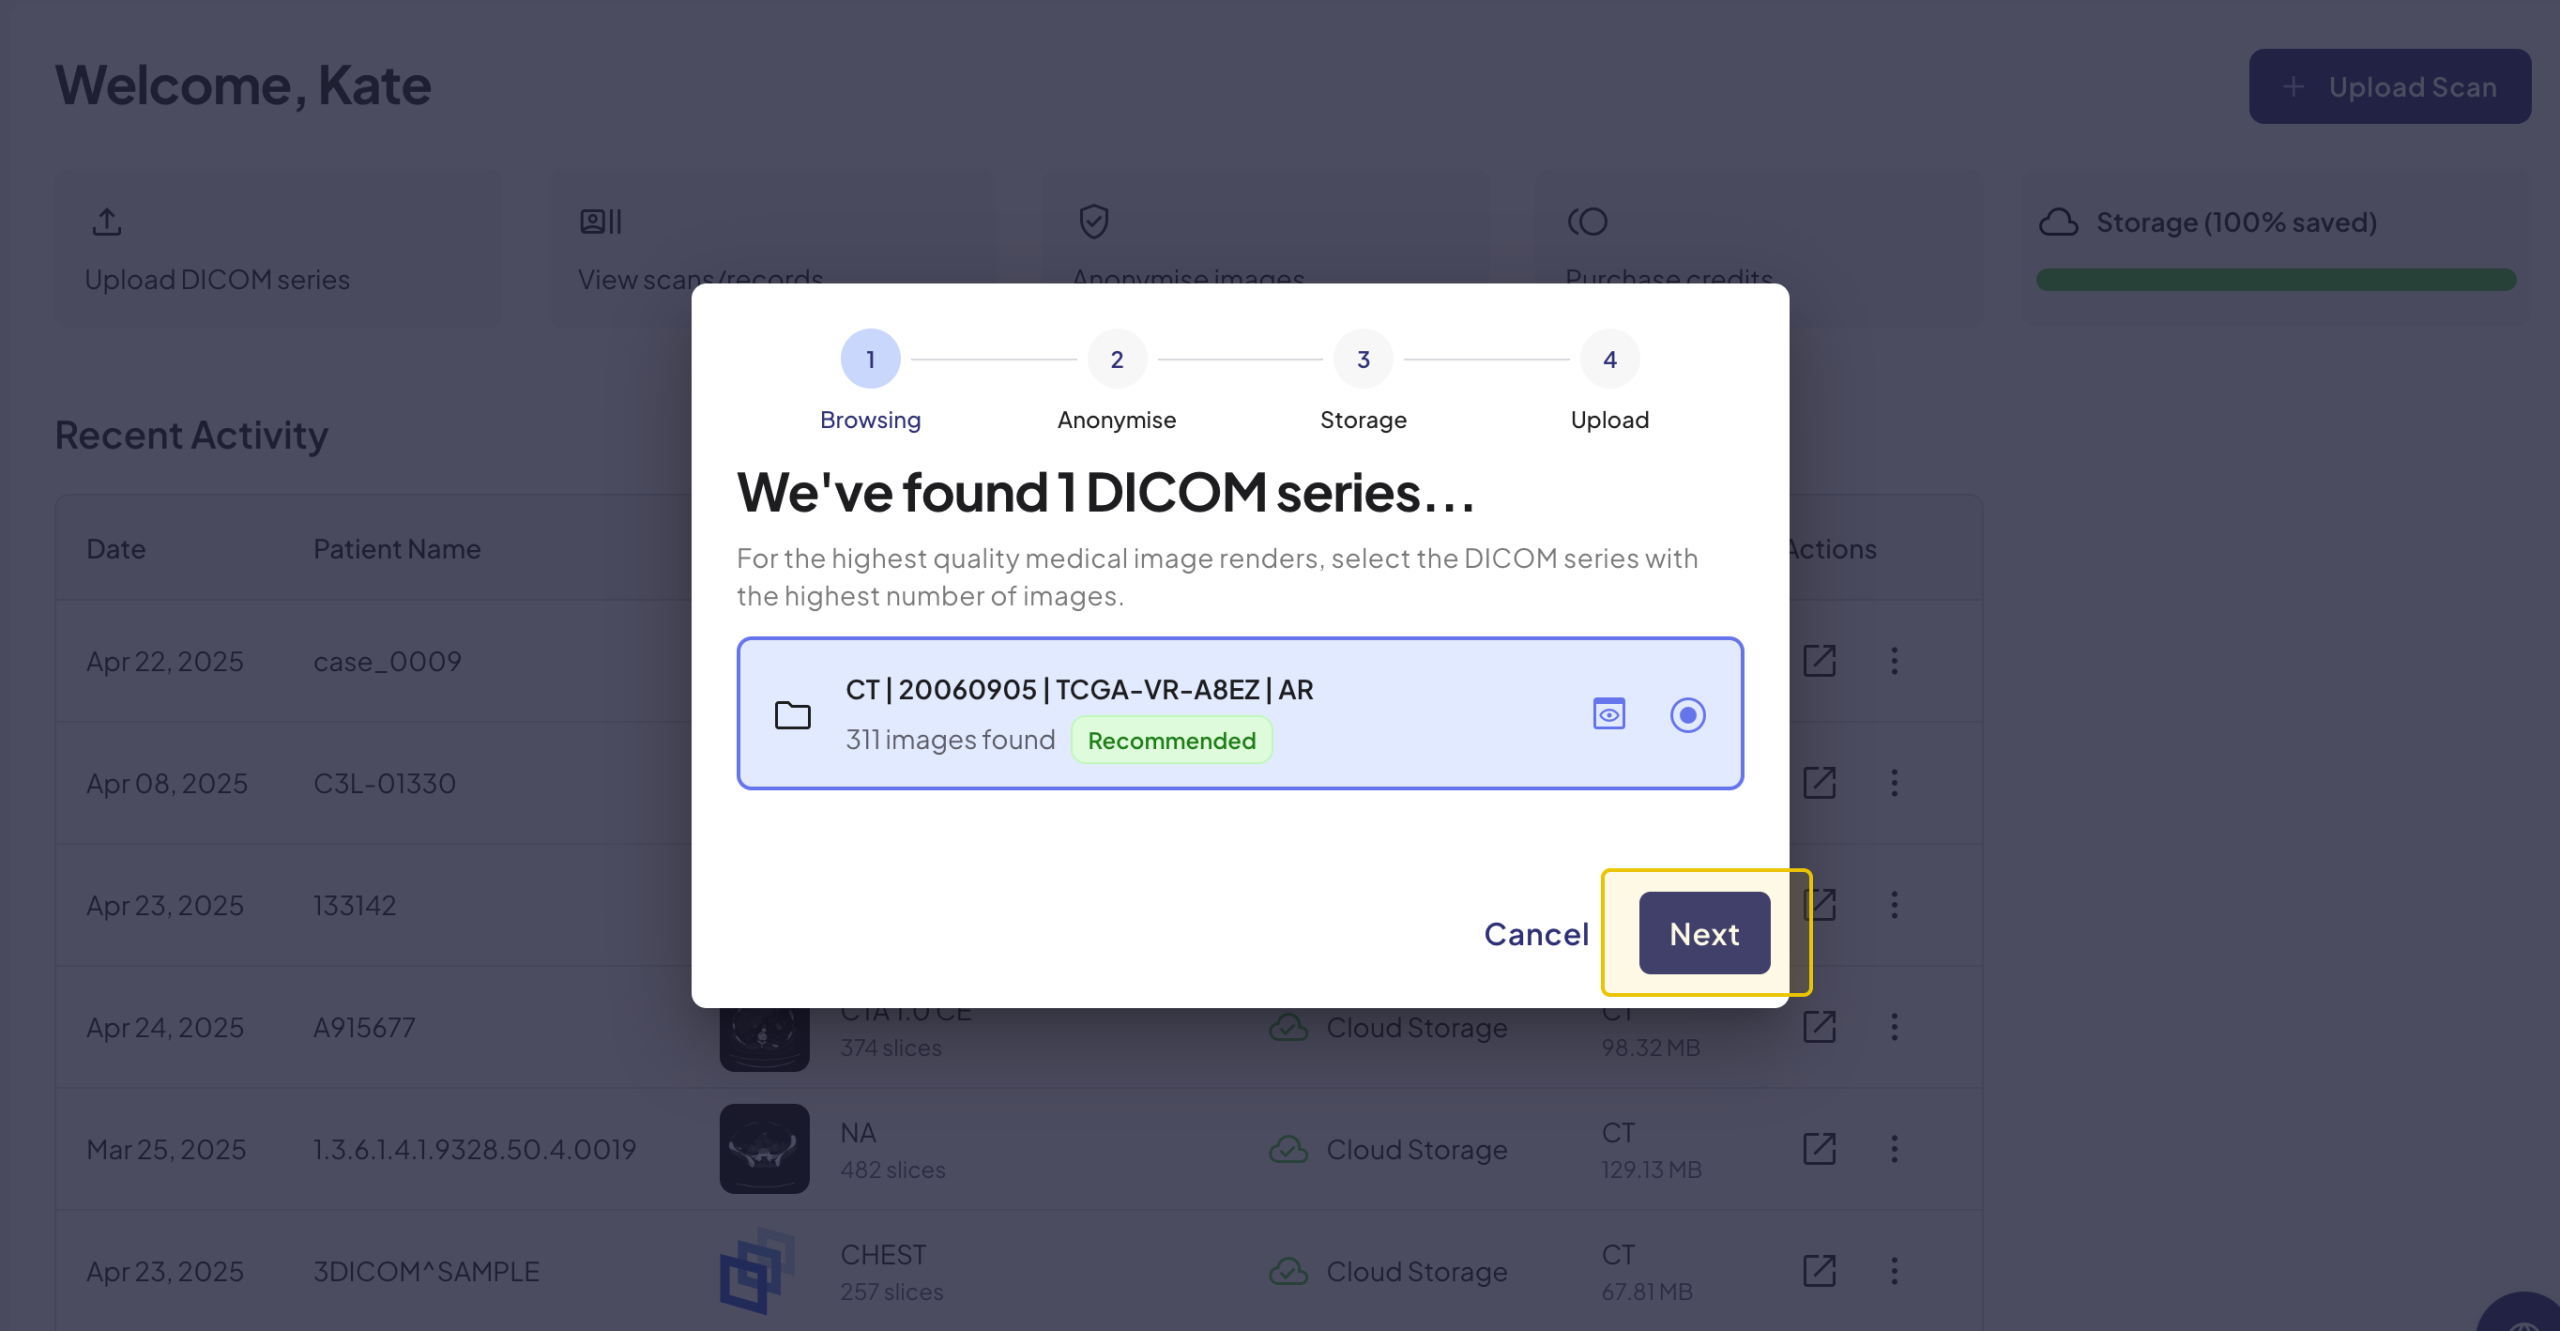
At this stage of the process, 3DICOM will browse your selected folder to identify any available DICOM series suitable for upload.
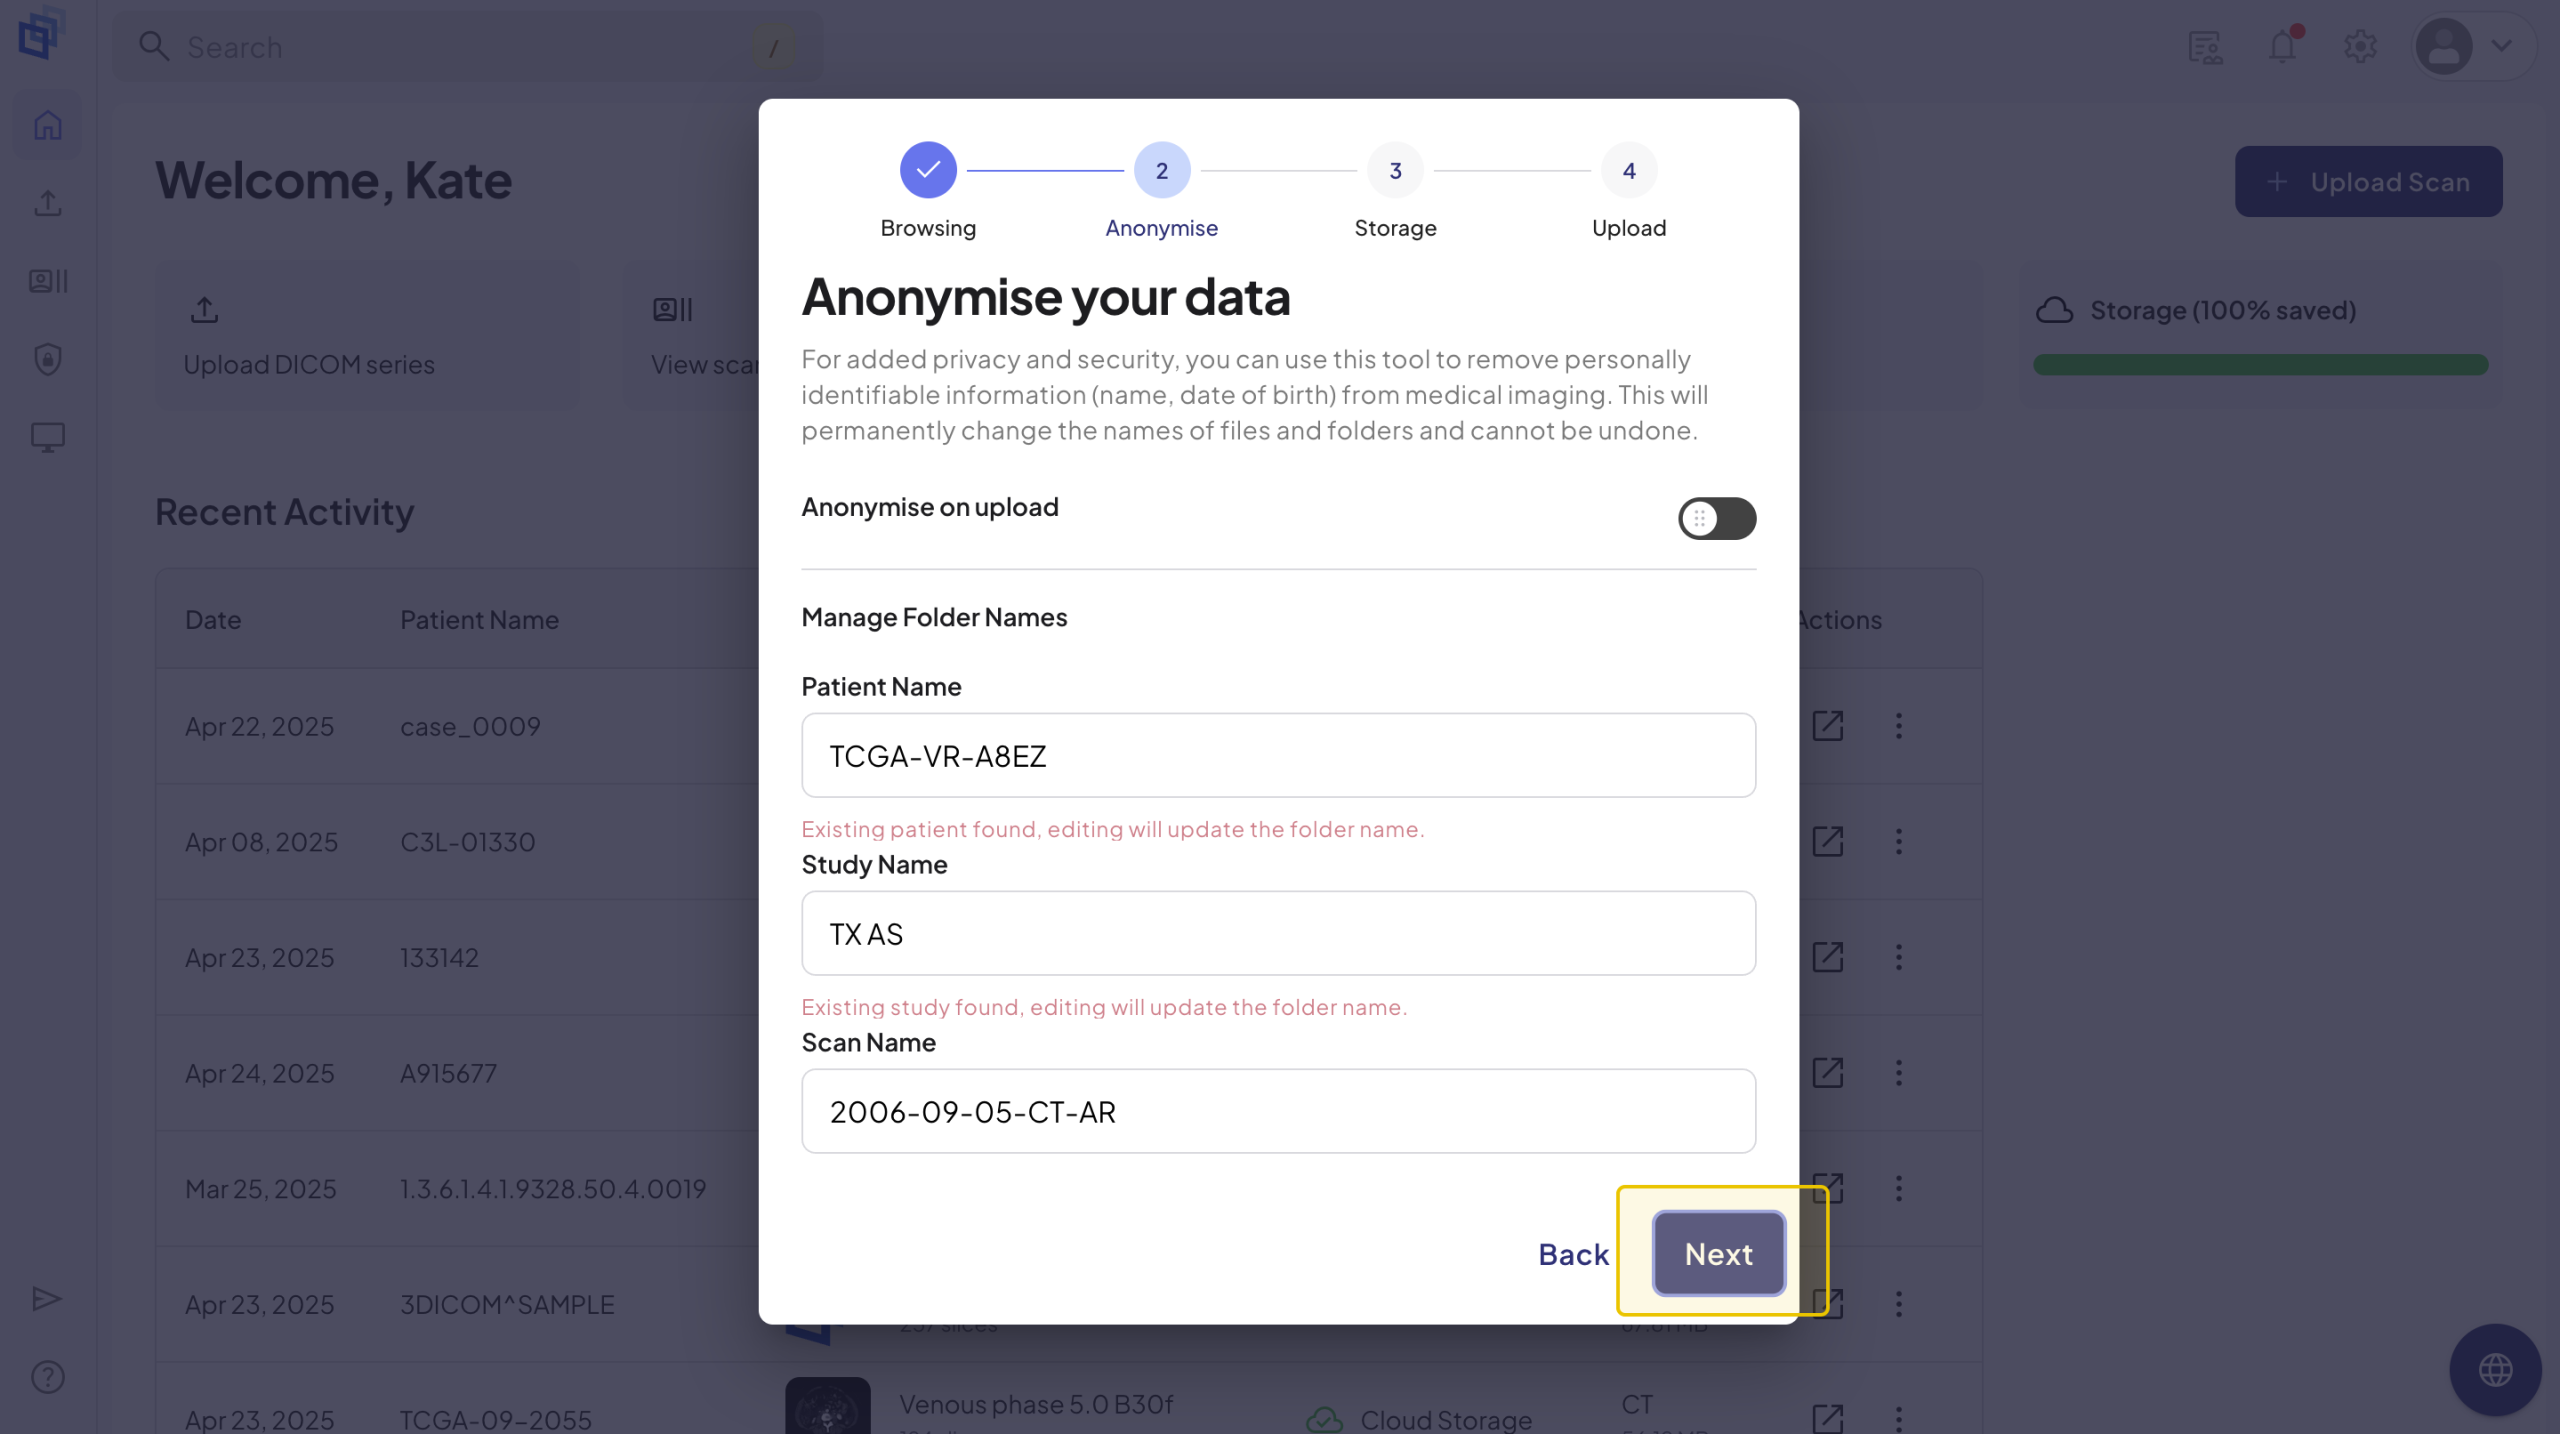
To understand the benefits of anonymizing scans and how to use the anonymization tool, visit Anonymizing Your Scans on 3DICOM.
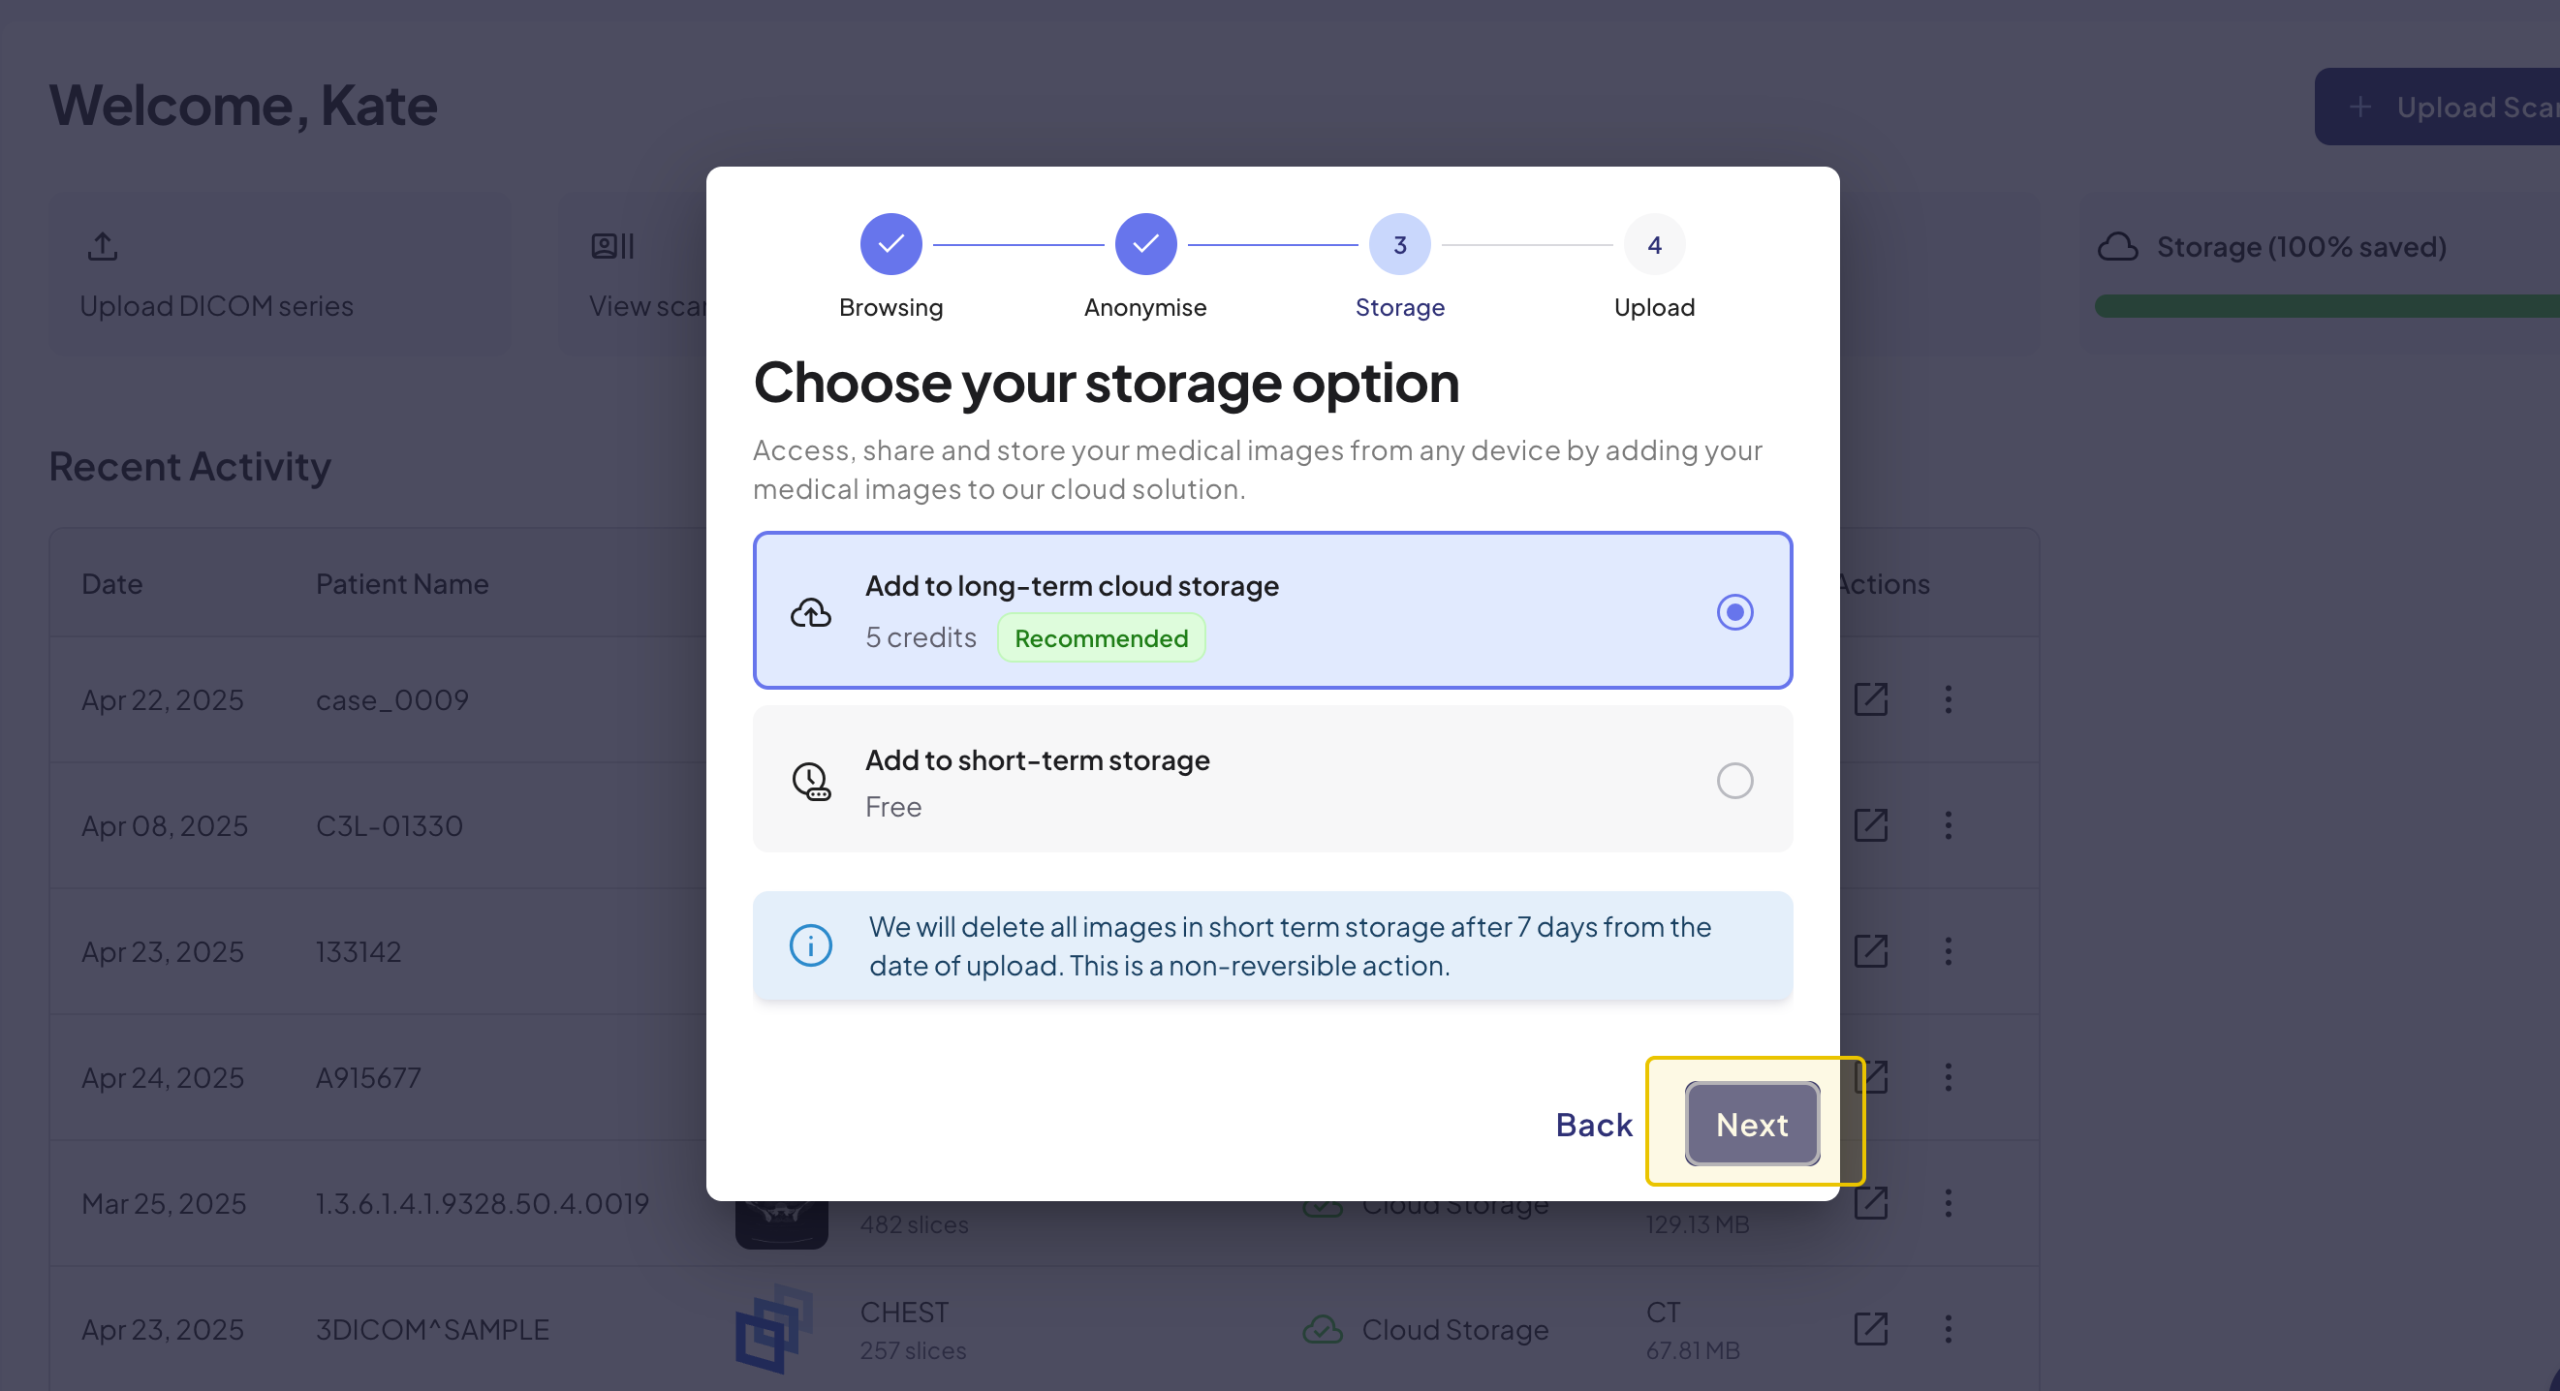
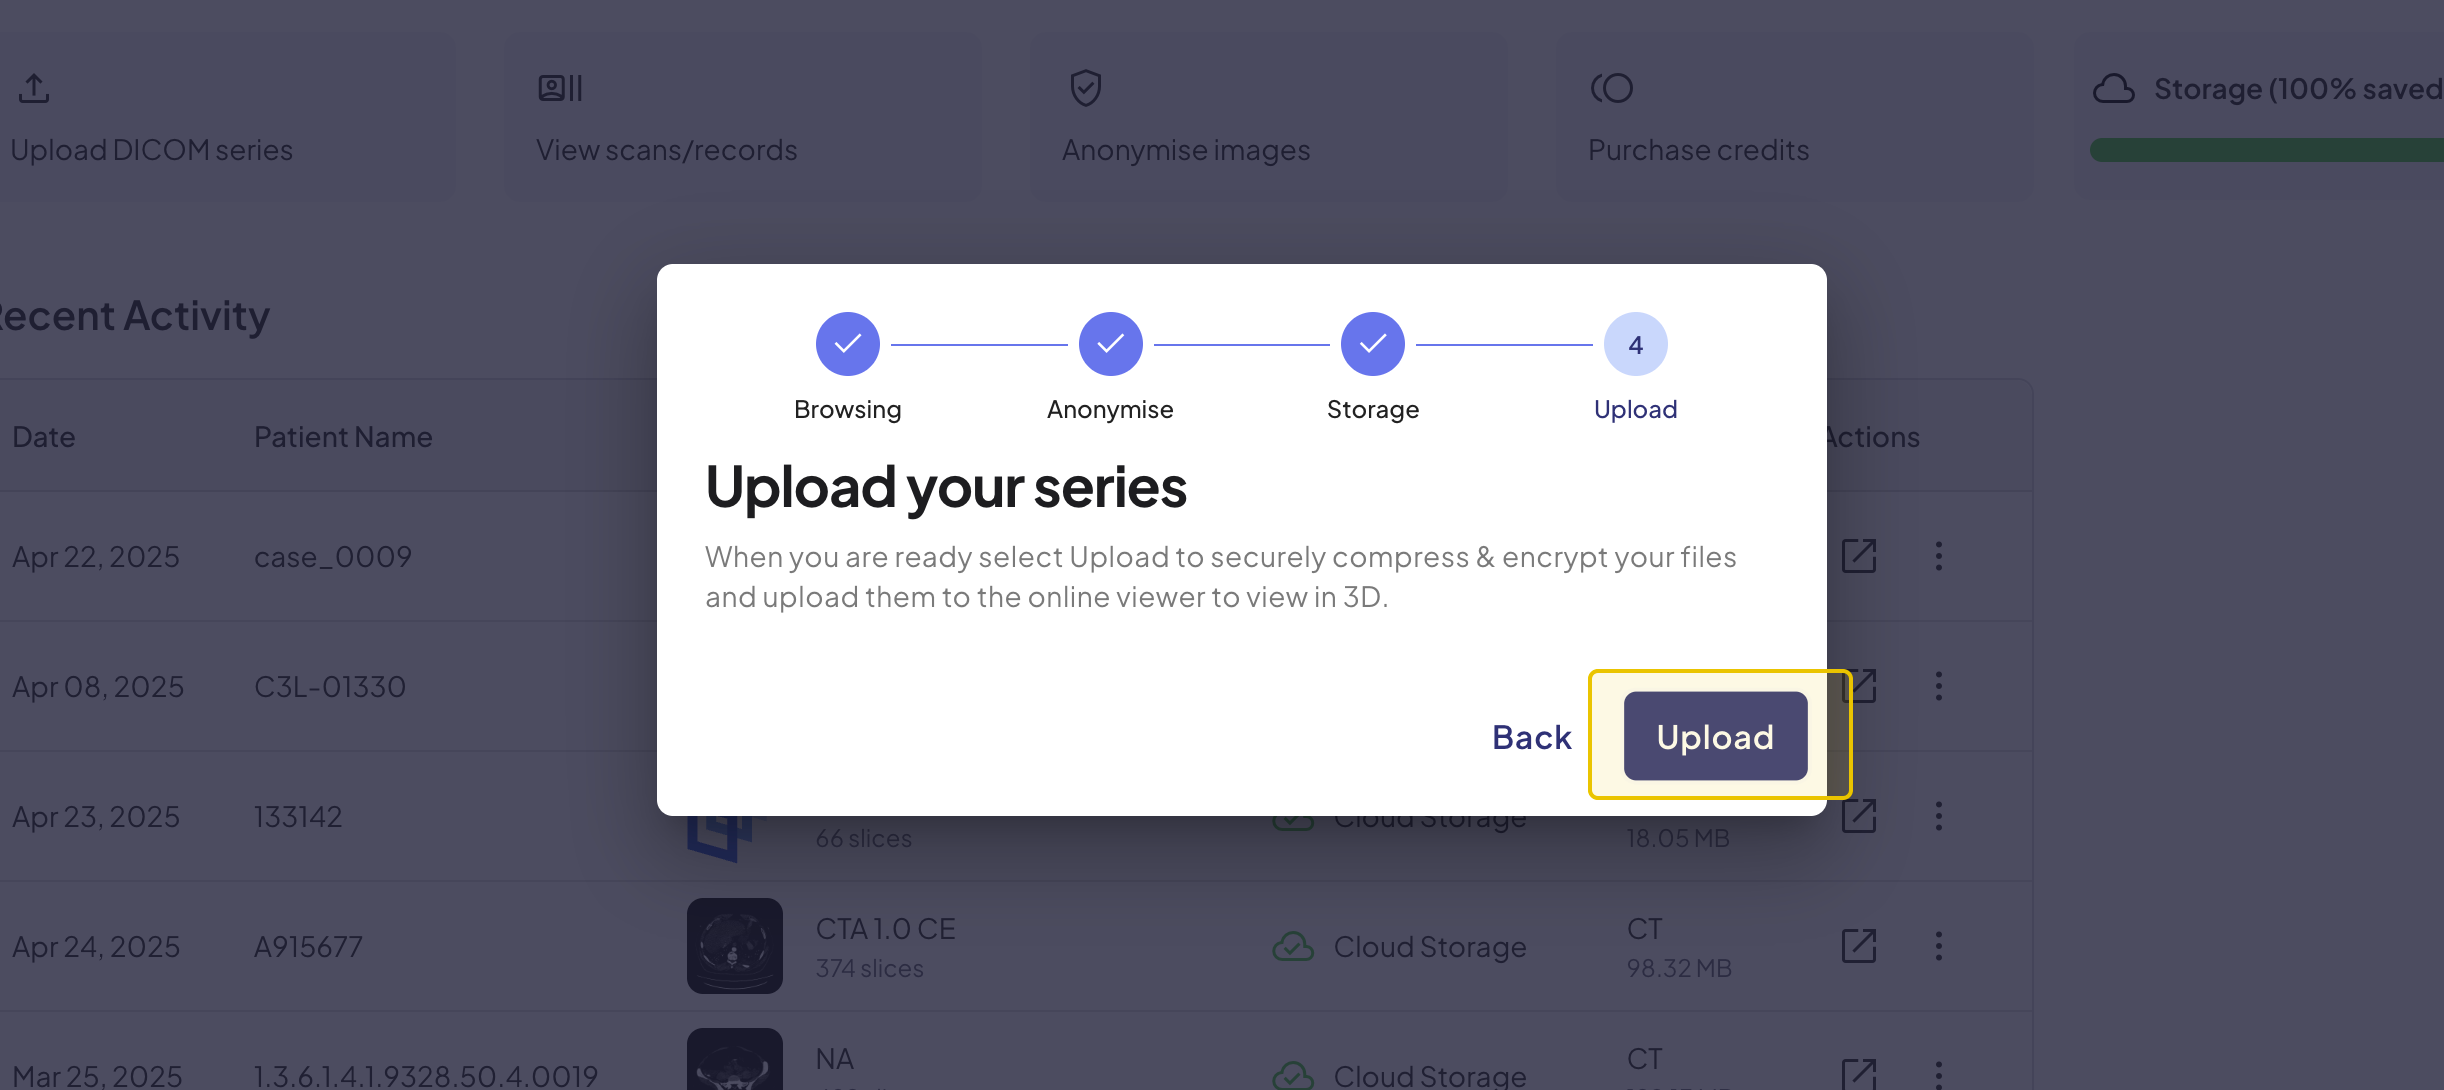
Once your scan is uploaded, it will open in the 3DICOM Online Viewer for both viewing and editing. Depending on your selected storage option, it will either be stored temporarily for seven days or saved for 365 days with long-term storage. You can manage your stored scans by upgrading or downgrading your storage anytime through your 3DICOM Account.
Upgrading Storage
Scan storage can be upgraded at any time via the Recent Activity panel or Scans/Records tab.
Instructions on how to upgrade your scan storage from both areas are provided below.
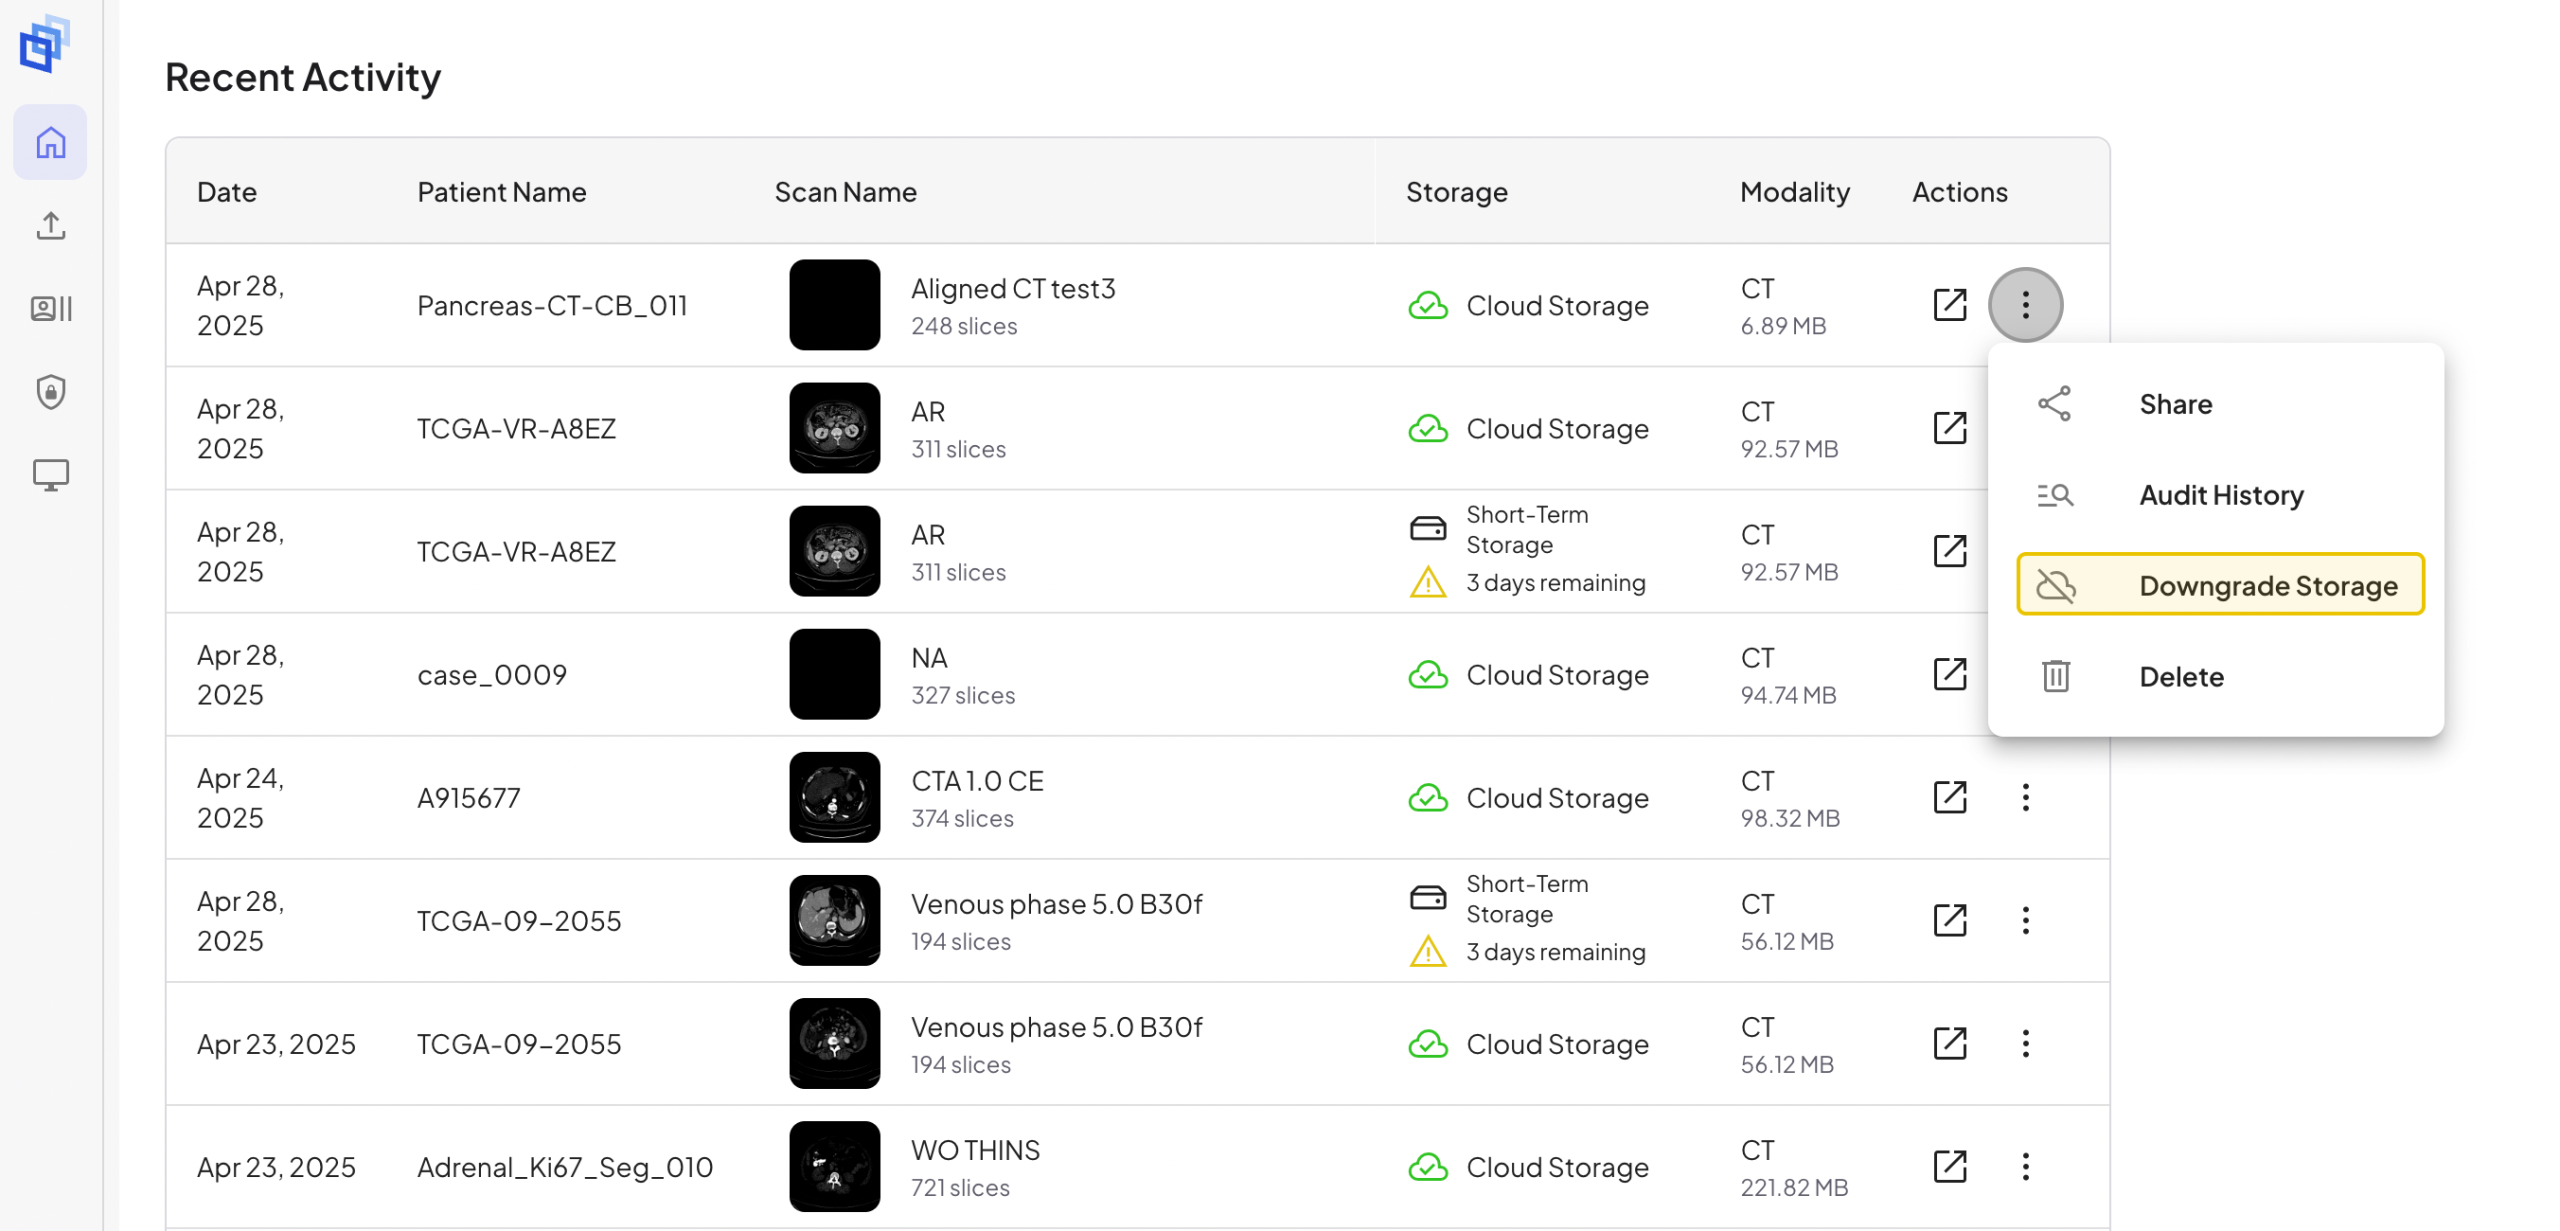
From Recent Activity
Steps to get there:

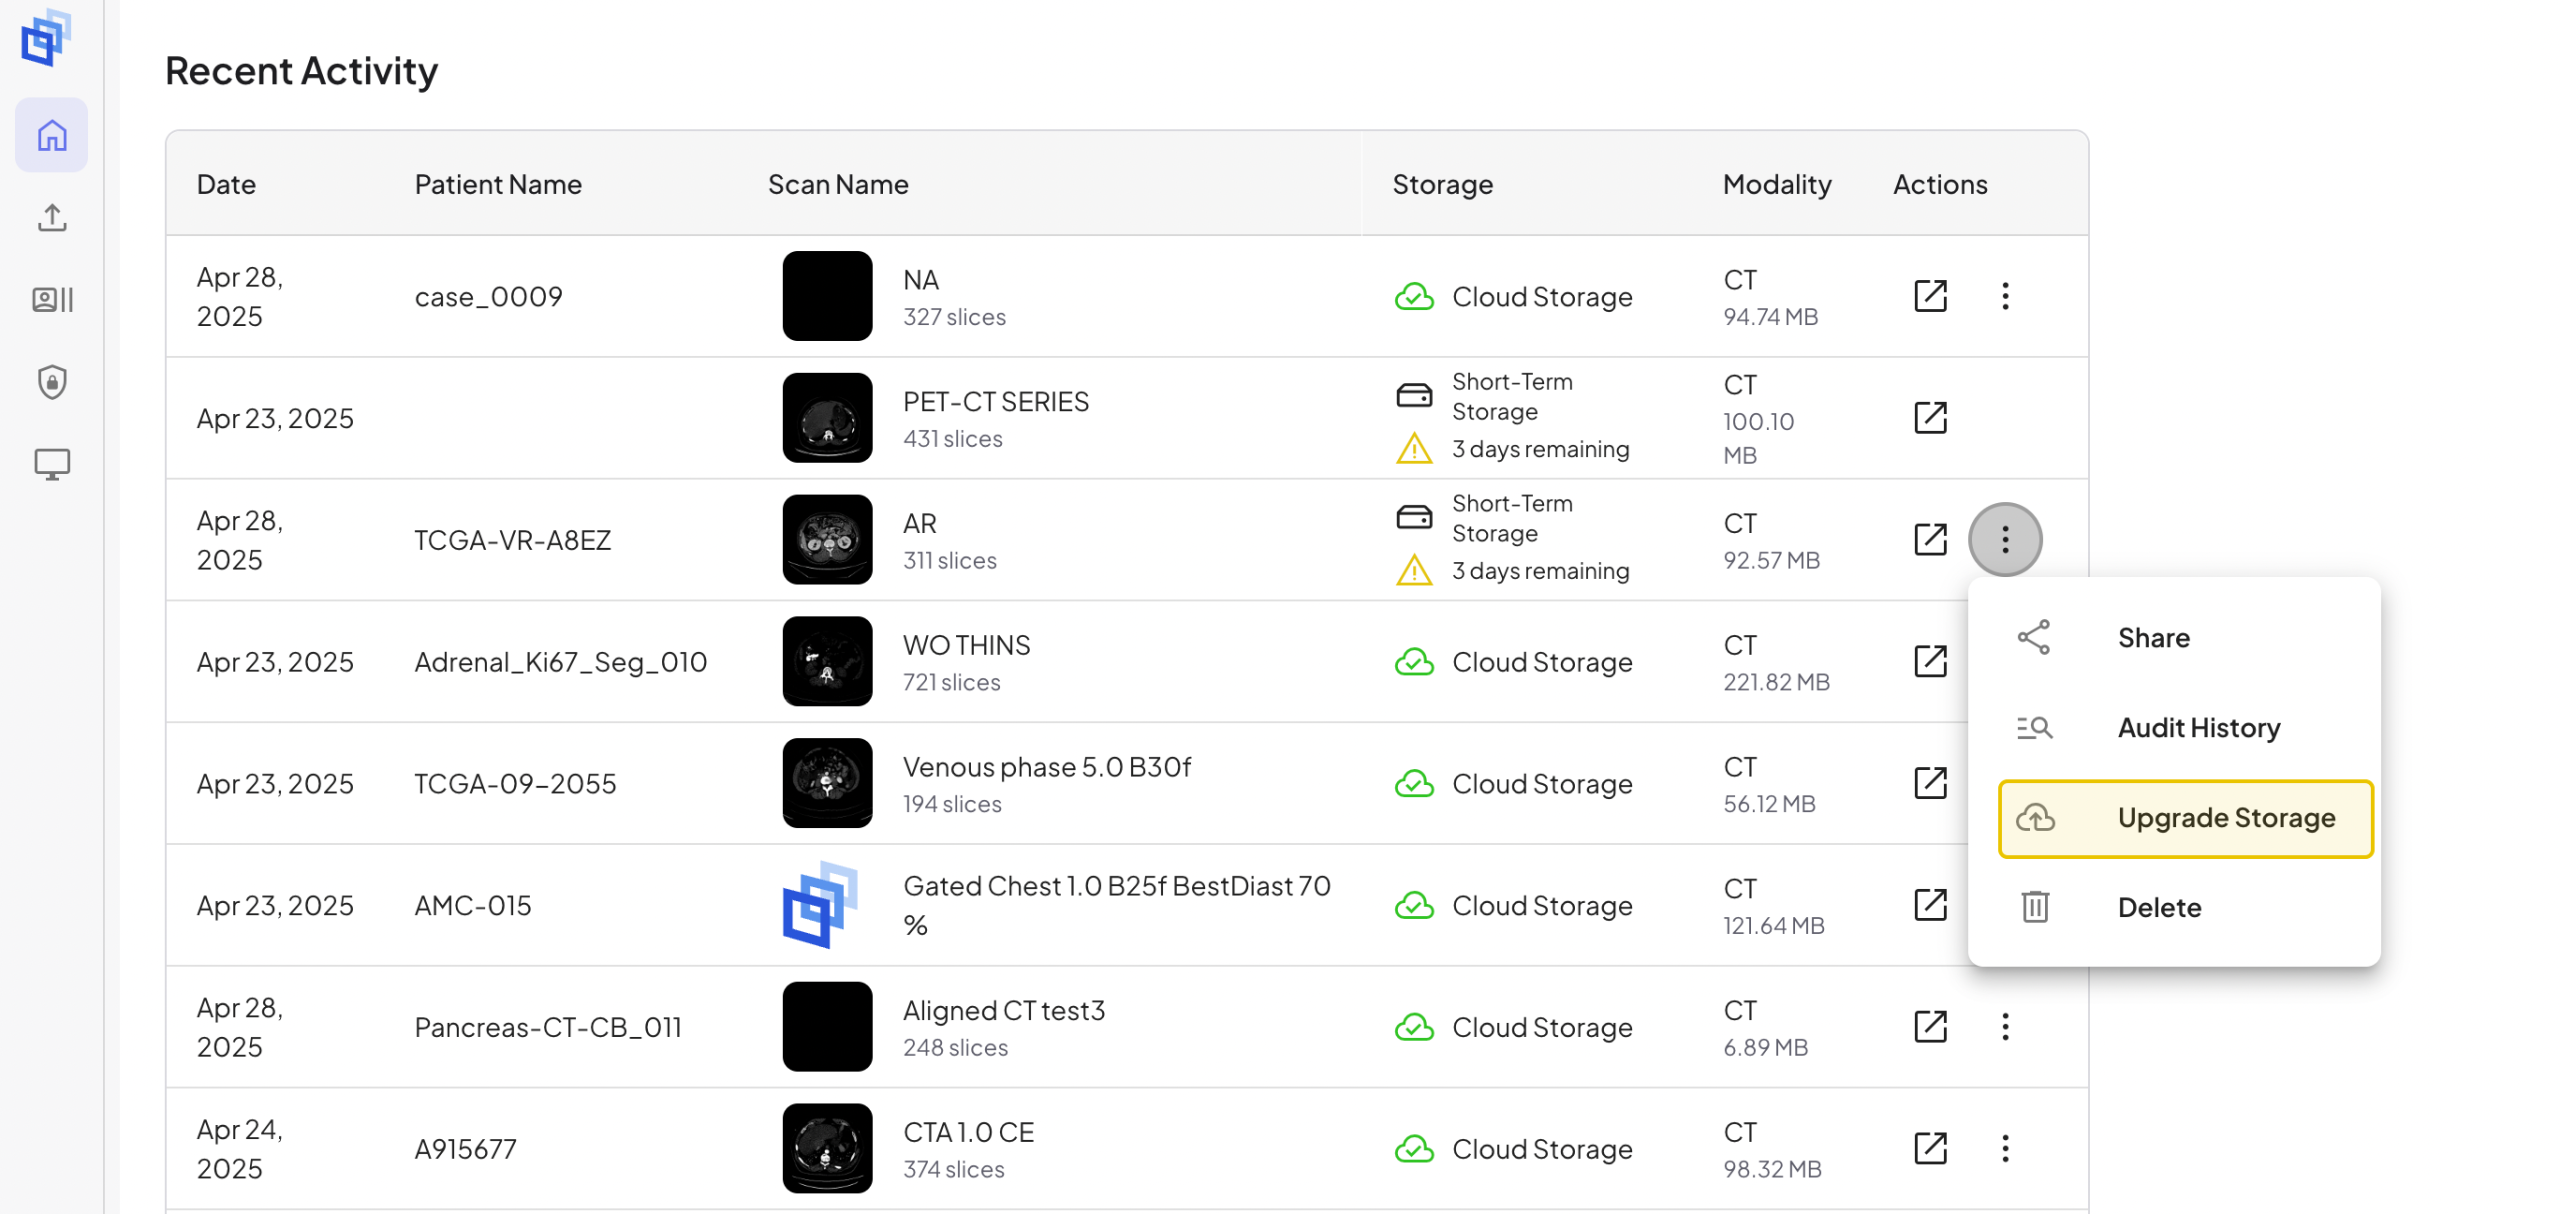
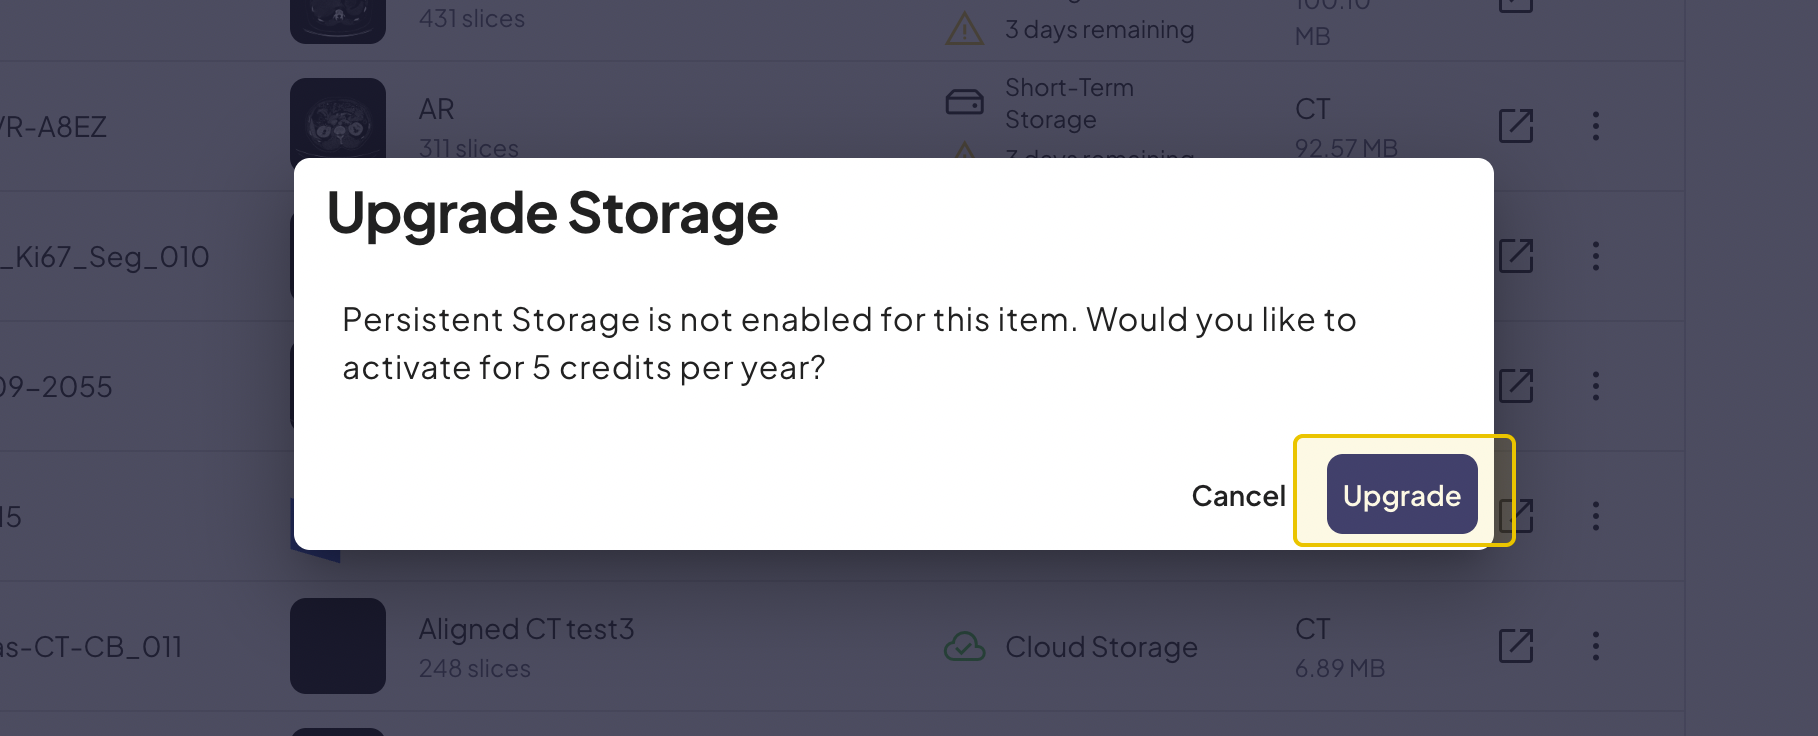
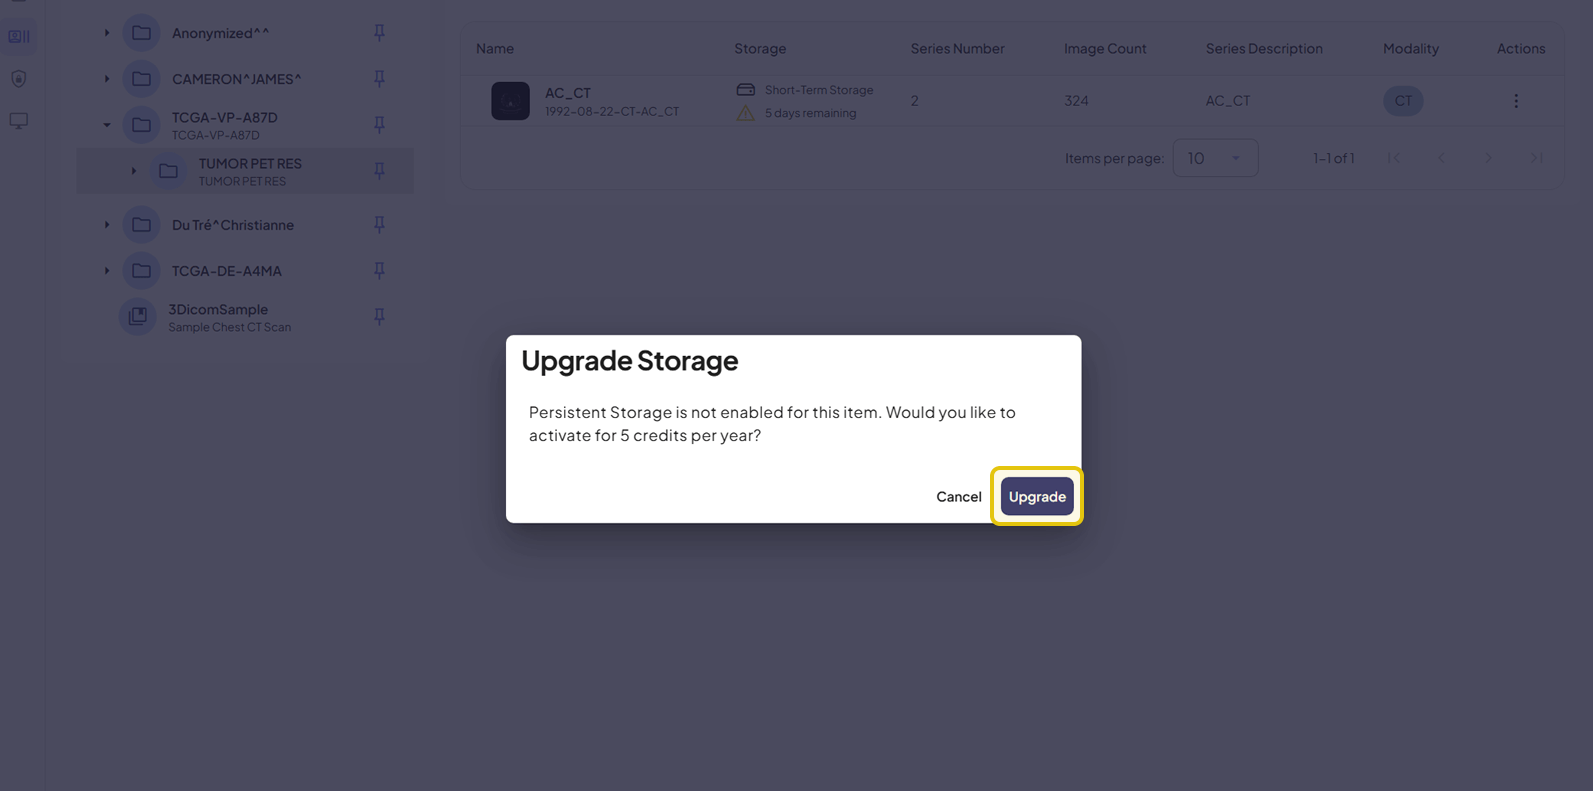
This will immediately upgrade your scan to long-term cloud storage and deduct 5 credits.
Downgrading Storage
Scan storage can be downgraded at any time via the Recent Activity panel or Scans/Records tab..
Instructions on how to downgrade your scan storage from both areas are provided below.
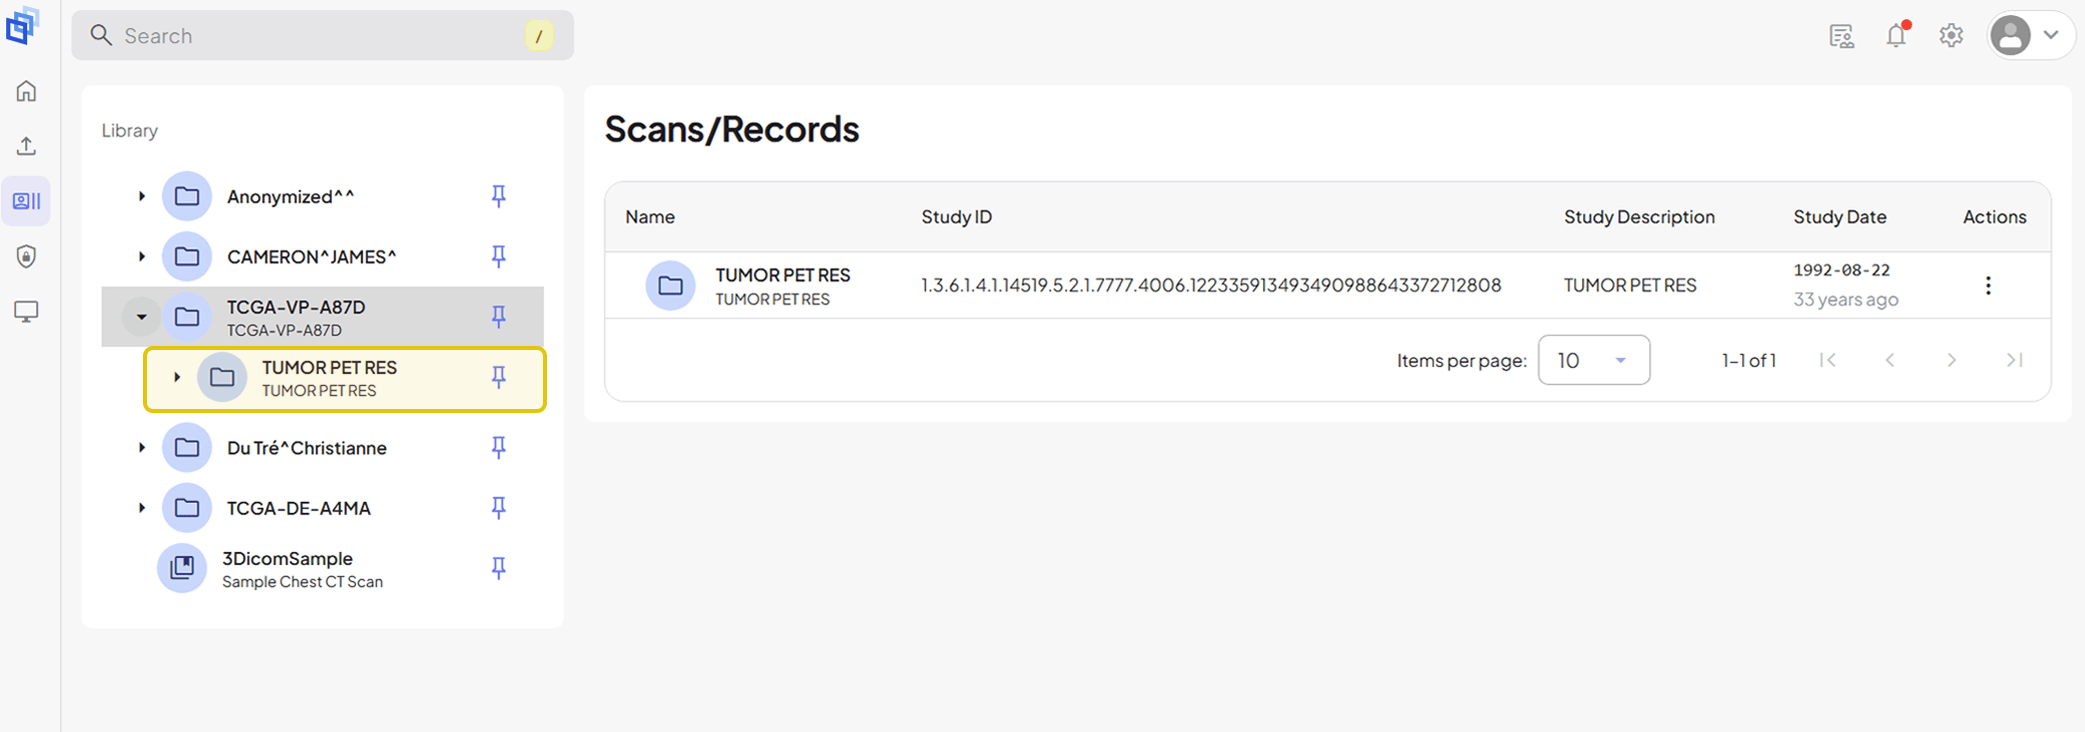
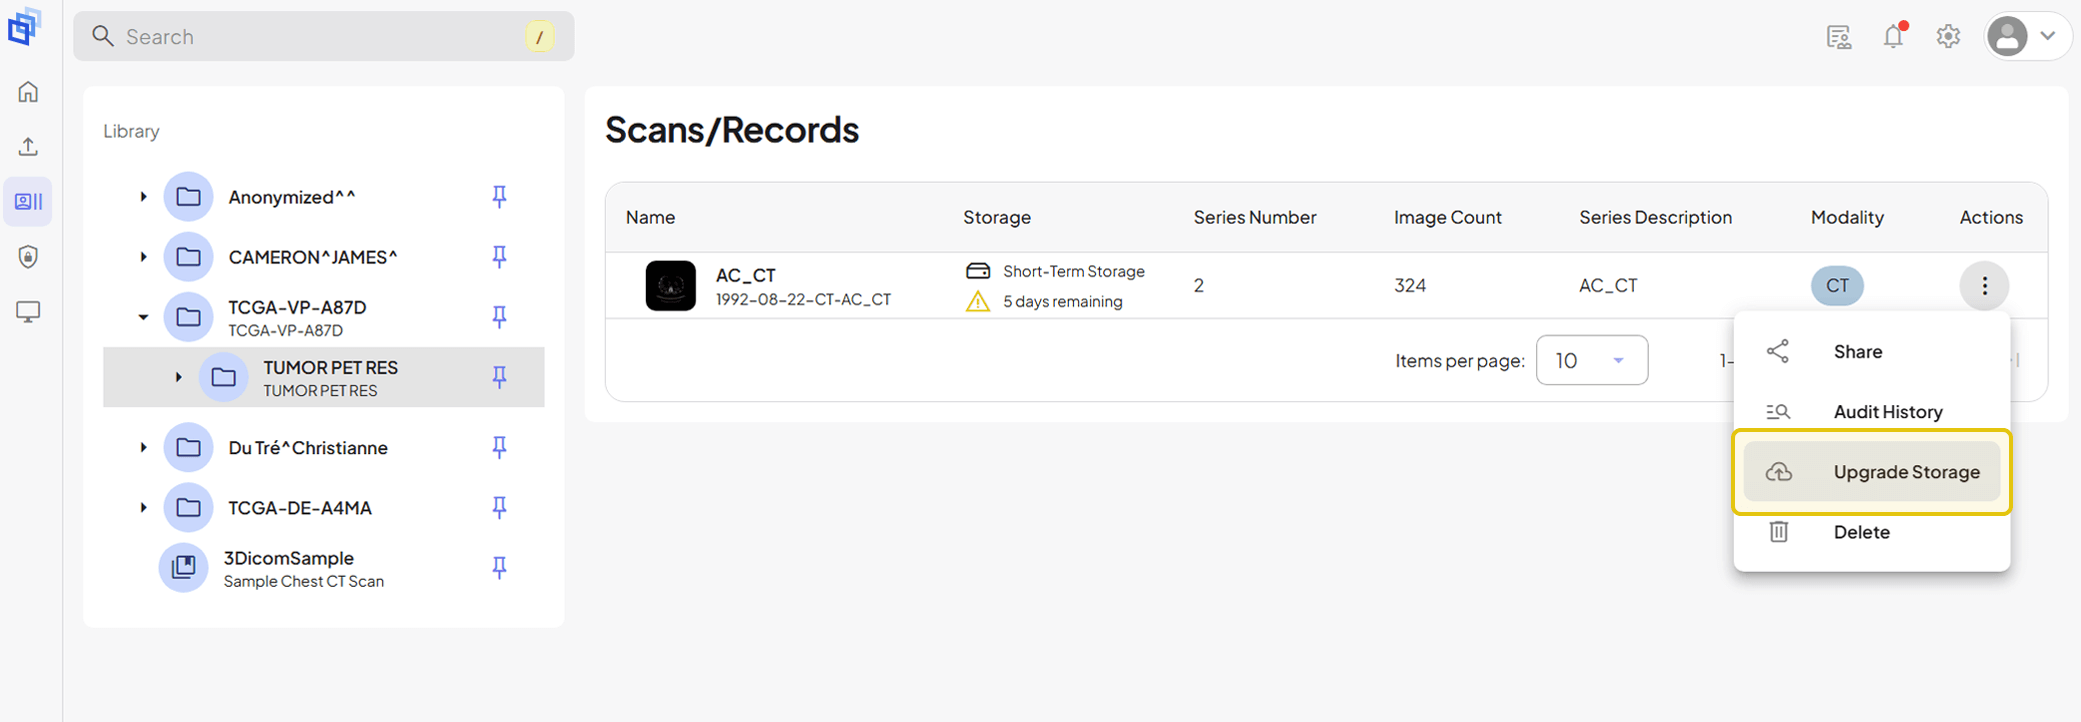
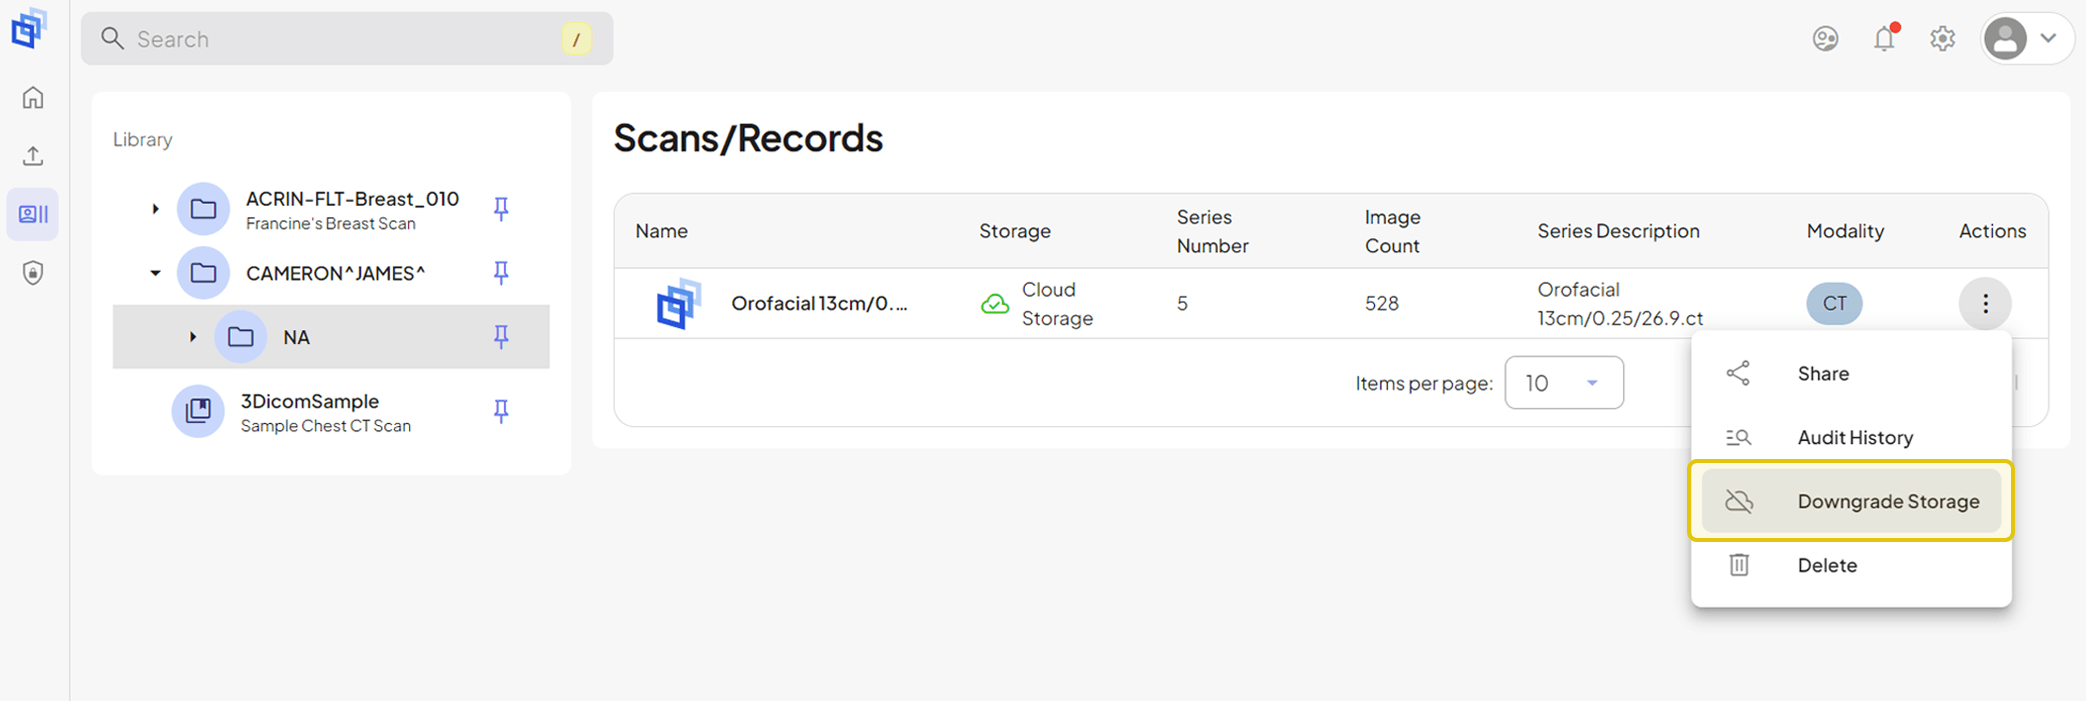
From Scans/Records
Steps to get there:

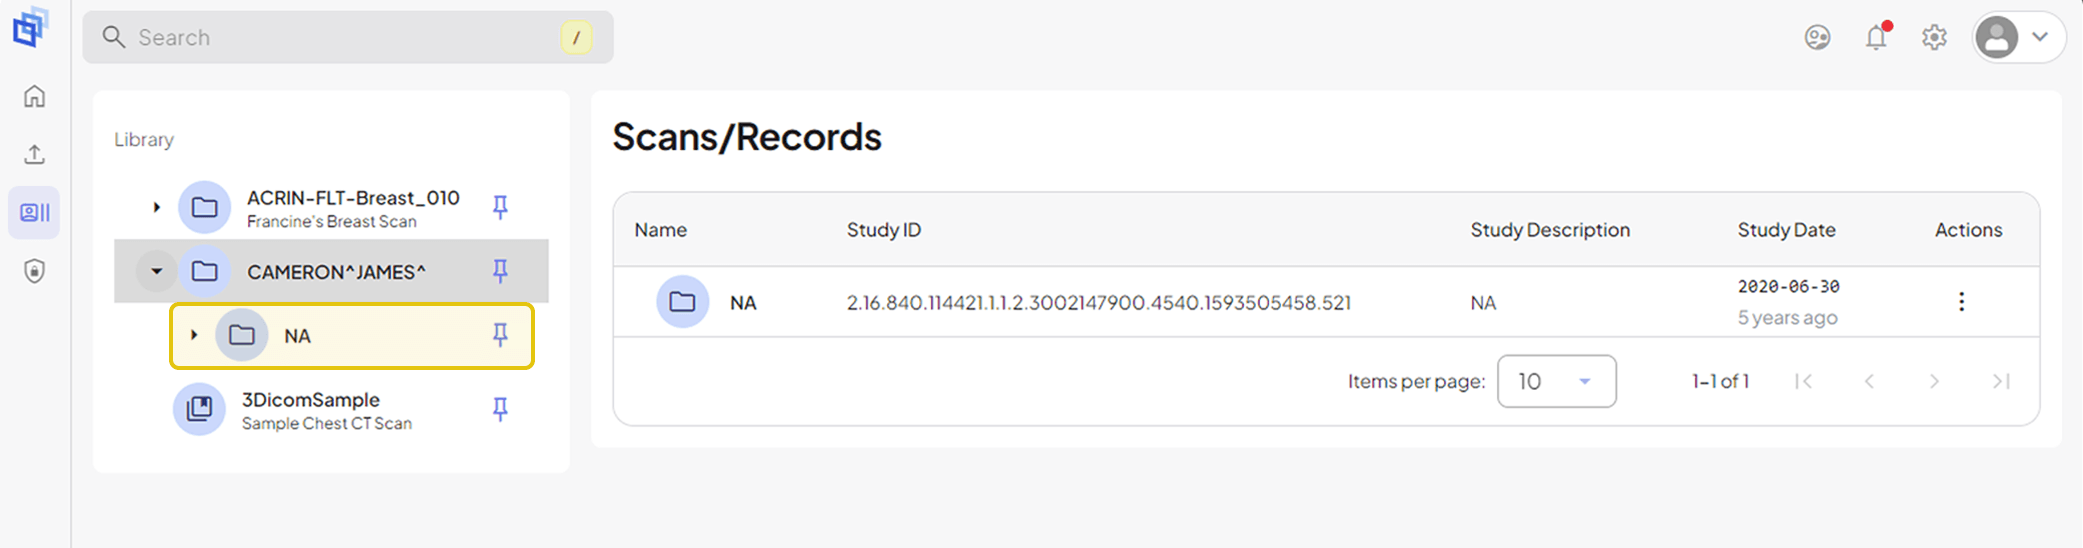
This first subfolder in the file structure is the Patient Study which contains the DICOM Series.
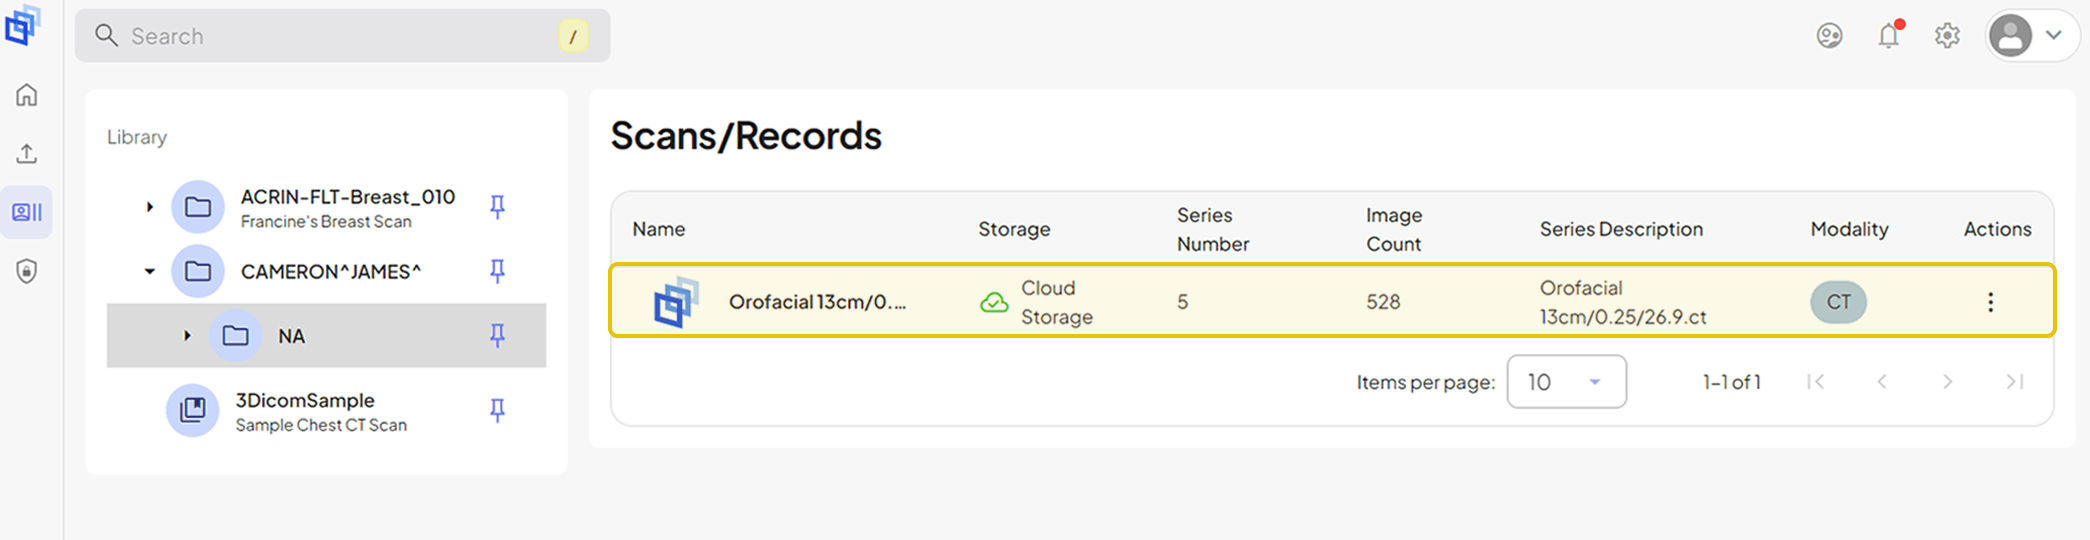
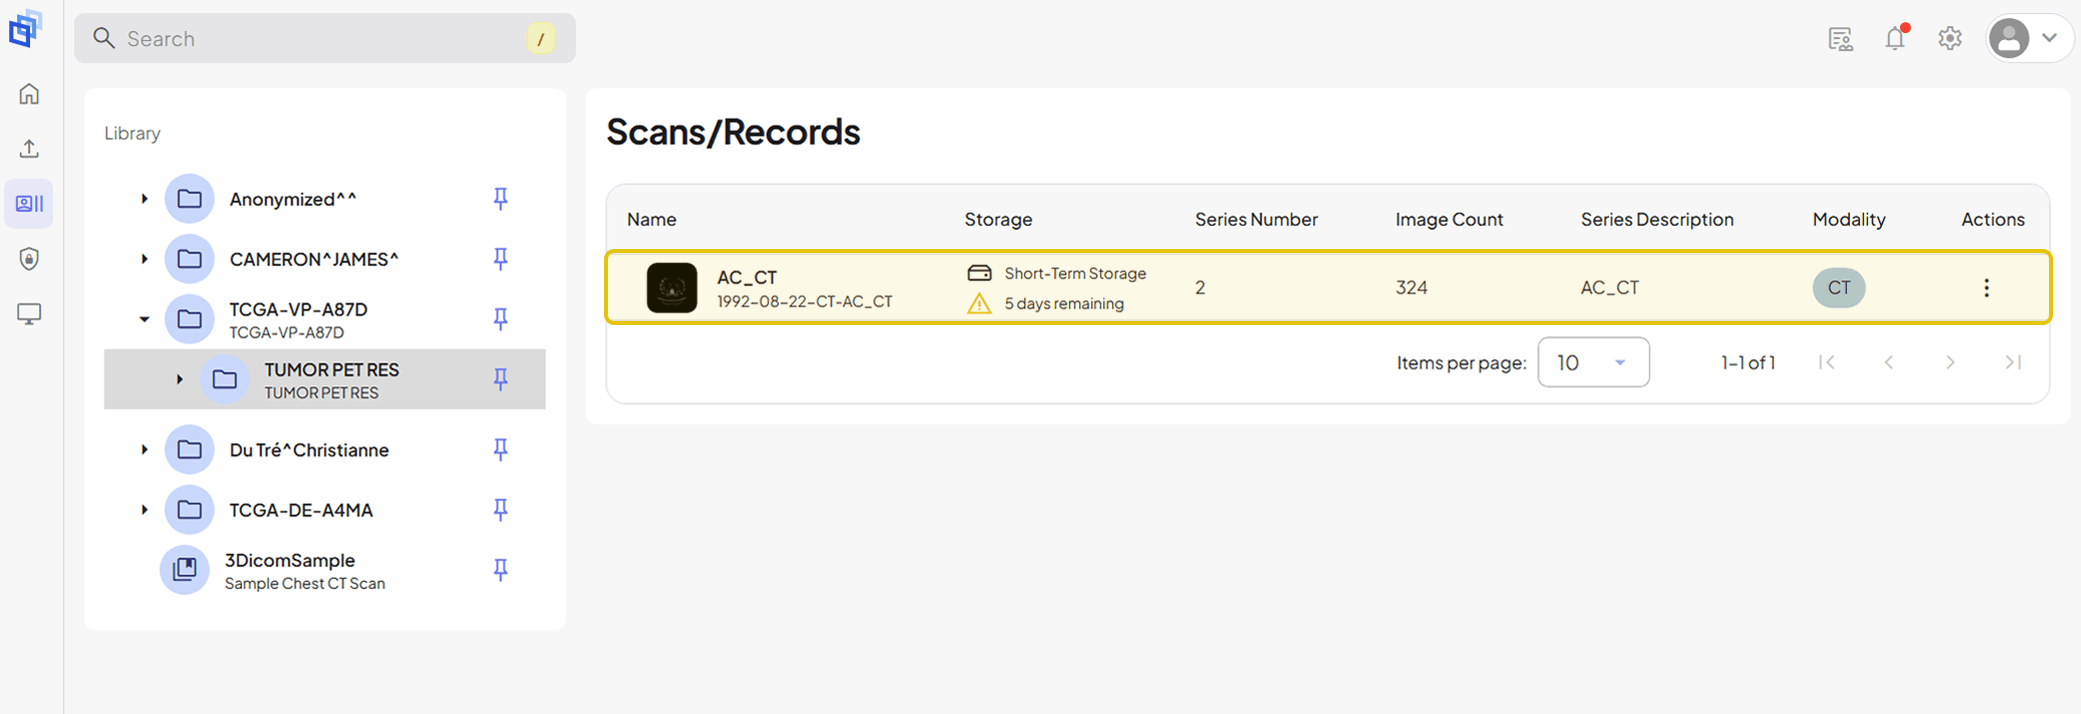
The DICOM Series contains your Scan and any other accompanying images and files, including (where applicable) PDF Notes or Reports and 3D Objects created through segmentation.
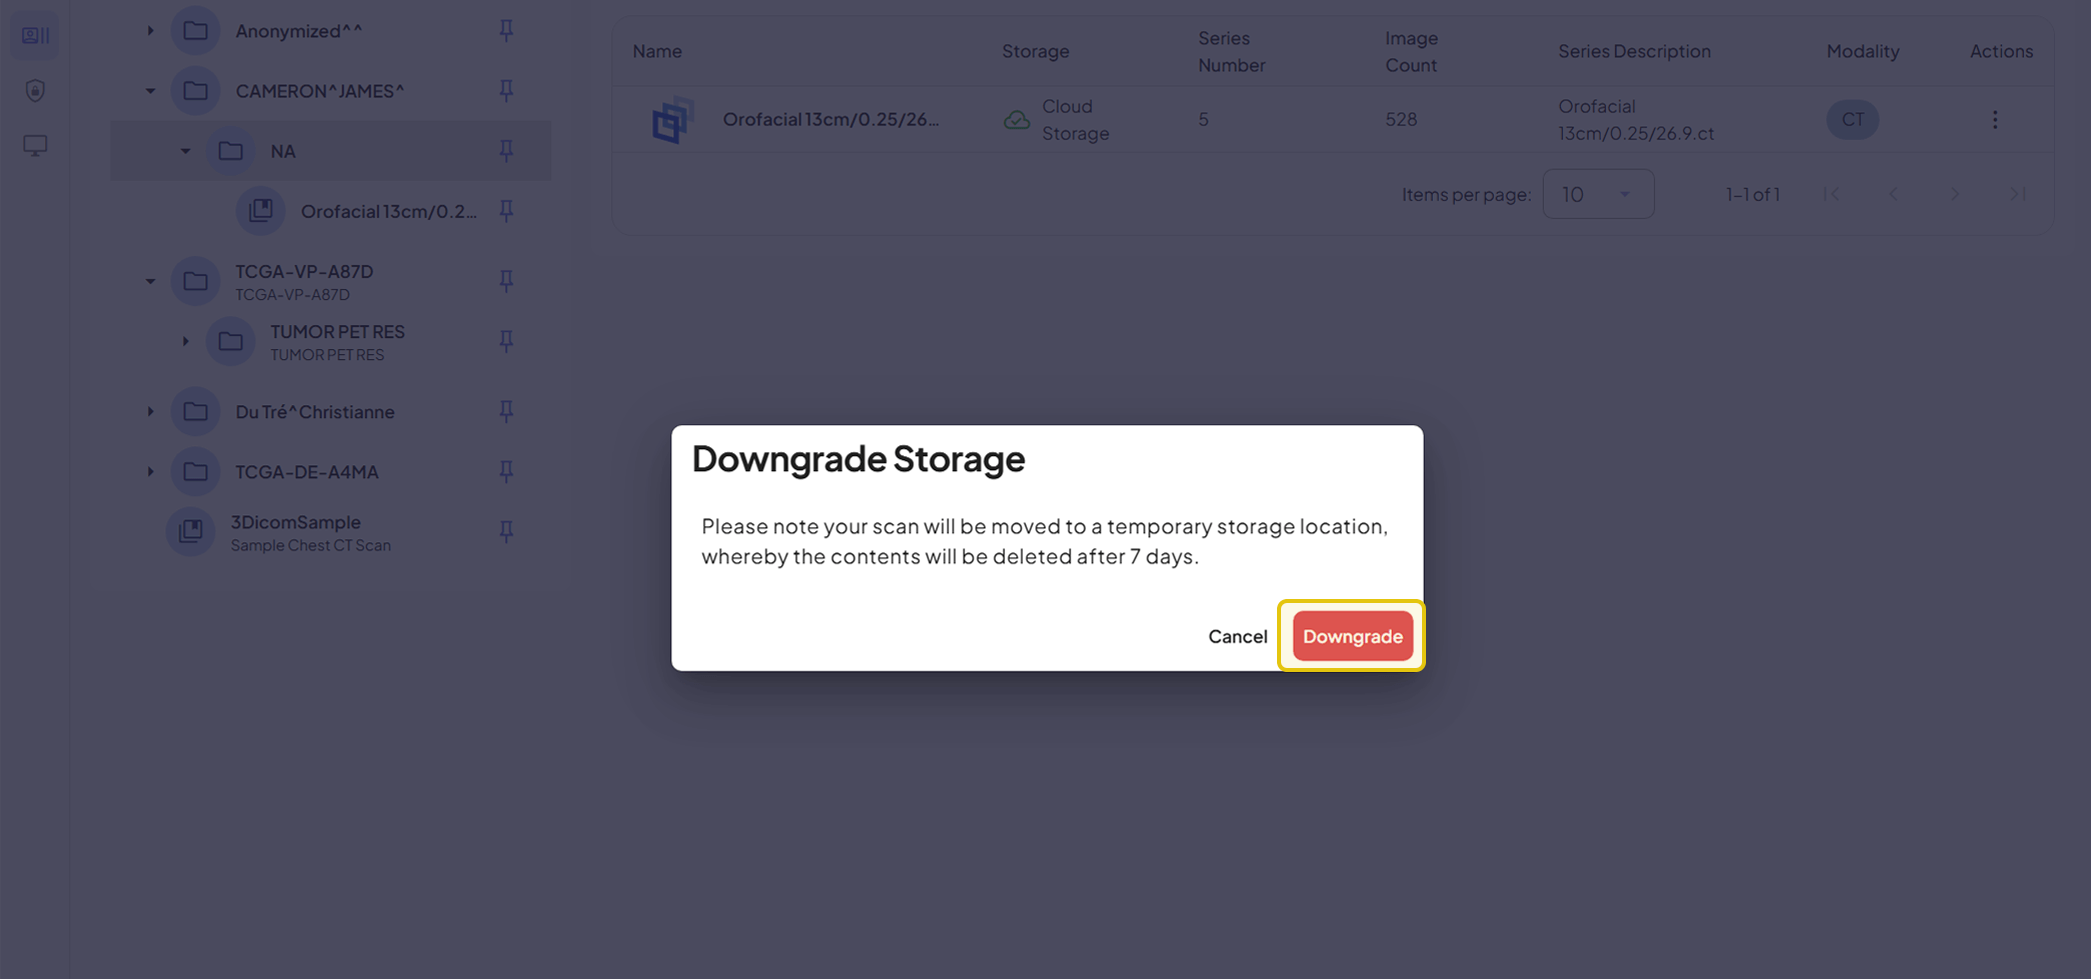
This will immediately downgrade your scan to short-term storage, allowing you to access and view it for 7 days before it expires.
CONCLUSION
Whether you’re uploading for short-term review or long-term reference, 3DICOM gives you complete control over how your scans are stored and accessed. Managing your medical files is easy on 3DICOM with the flexible options and simple upgrade or downgrade functionality. 3DICOM’s storage solutions provide flexibility, security, and control, allowing you to handle your medical imaging information on your own terms.
Frequently Asked Questions
Here are answers to some of our most common storage questions, ensuring you have a clear understanding of how to securely store, manage, and access your medical imaging.
What happens when my scan storage is about to expire?
If your short-term scan storage is nearing expiration, you will receive a push notification directly within your 3DICOM Account. If you have the 3DICOM Mobile app linked to your account, you will also receive a notification there, ensuring you are aware before your scan is deleted.
Is my data secure?